FrontISTR / Getting Started
തുടക്കം
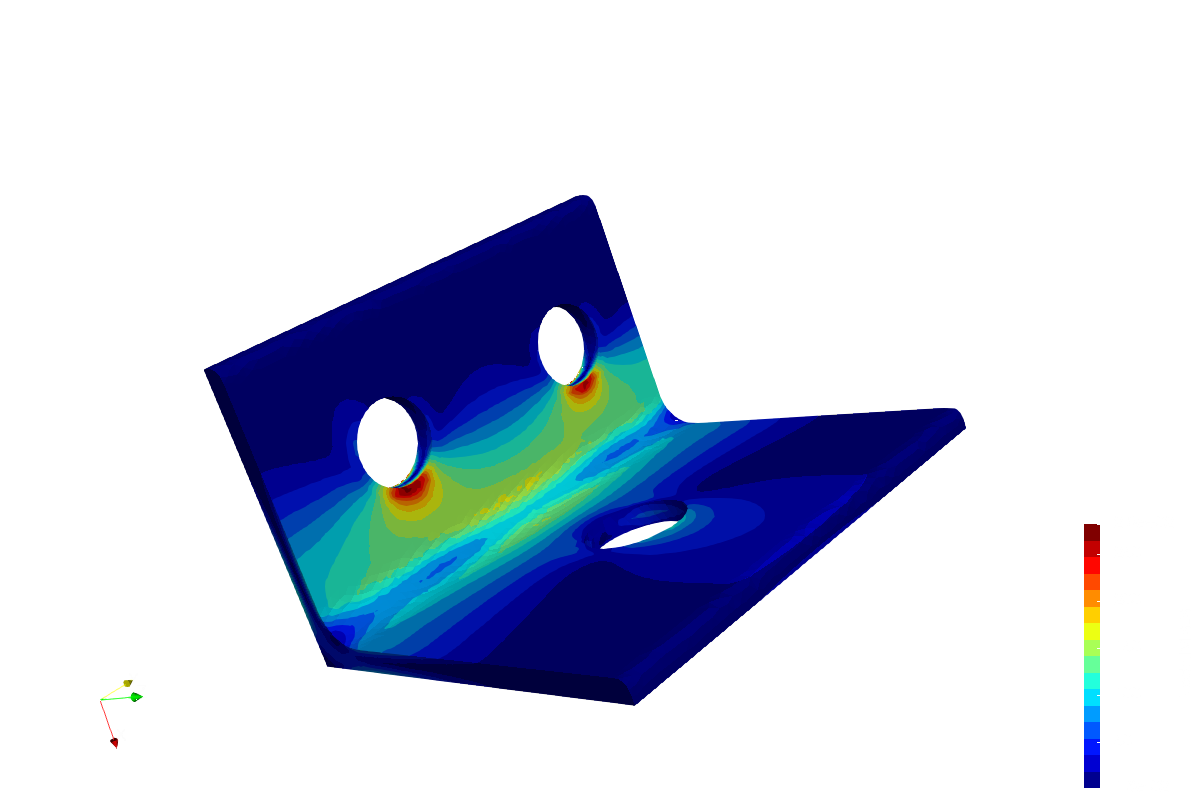
FrontISTR ഉപയോഗിച്ച് ഒരു ഹിഞ്ച് വിശകലനം നടത്തി, തുടർന്ന് ParaView-ൽ stress distribution കാണുക. സോൾവർയും തയ്യാറായ example ഉം ഉണ്ടെങ്കിൽ ആദ്യ ശ്രമത്തിനായി mesh ഉണ്ടാക്കുന്നതിൽ നിന്ന് തുടങ്ങേണ്ടതില്ല.
01
solver തയ്യാറാക്കുക
Windows binary അല്ലെങ്കിൽ Windows, macOS, Linux എന്നിവയിൽ ഉപയോഗിക്കാവുന്ന Docker image തയ്യാറാക്കുക.
Windows (64-bit)
ZIP extract ചെയ്യുക. അടുത്ത ഘട്ടത്തിൽ example തയ്യാറാക്കിയ ശേഷം fistr1.exeയും കൂടെ വരുന്ന എല്ലാ DLLകളും example folder (01_elastic_hinge) ലേക്ക് copy ചെയ്യുക.
Docker (Windows / macOS / Linux)
Docker ആരംഭിച്ച് terminalൽ താഴെയുള്ള command പ്രവർത്തിപ്പിക്കുക. Windowsൽ Docker നെ Linux container modeൽ ഉപയോഗിച്ച് command PowerShellൽ പ്രവർത്തിപ്പിക്കുക.
docker pull --platform linux/amd64 registry.gitlab.com/frontistr-commons/frontistr/fistr1:masterനിലവിലെ ഔദ്യോഗിക image amd64 നായി build ചെയ്തതാണ്. Apple Silicon Mac-കളിൽ ഇത് emulation വഴി പ്രവർത്തിക്കുന്നതിനാൽ കൂടുതൽ സമയം എടുക്കാം.
source ൽ നിന്ന് build ചെയ്യുക
ഈ operating systemകളിൽ ഏതിലും source codeൽ നിന്ന് FrontISTR build ചെയ്യാം. compilerകളും ആവശ്യമായ libraryകളും install ചെയ്ത ശേഷം CMake environment തിരിച്ചറിഞ്ഞ് build configure ചെയ്യും.
നിങ്ങളുടെ distribution അനുസരിച്ച് താഴെയുള്ള commandകൾ ഉപയോഗിച്ച് അടിസ്ഥാന tools install ചെയ്യുക. നിലവിലുള്ള development environment ഉപയോഗിച്ച് MPI അല്ലെങ്കിൽ മറ്റ് optional libraryകൾ ചേർക്കാതെ തുടങ്ങാം.
Ubuntu / Debian
sudo apt-get update
sudo apt-get install build-essential cmake git gfortran
RHEL / Rocky Linux / AlmaLinux
sudo dnf install gcc gcc-c++ gcc-gfortran make cmake gitതാഴെയുള്ള commandകൾ macOS, Linux എന്നിവയിൽ build ചെയ്യാനും install ചെയ്യാനുമുള്ള ഉദാഹരണമാണ്. executableകൾ നിങ്ങളുടെ home directoryയിലെ binലേക്ക് പോകുന്നതിനാൽ sudo അല്ലെങ്കിൽ PATH മാറ്റം ആവശ്യമില്ല. macOS/Windows തയ്യാറാക്കലിനും optional libraryകൾക്കും build guide കാണുക.
git clone https://gitlab.com/FrontISTR-Commons/FrontISTR.git
cd FrontISTR
cmake -S . -B build -DCMAKE_BUILD_TYPE=Release -DCMAKE_INSTALL_PREFIX="$HOME"
cmake --build build --parallel
cmake --install build
കൂടെ നൽകിയിരിക്കുന്ന example വീണ്ടും download ചെയ്യാതെ നേരിട്ട് പ്രവർത്തിപ്പിക്കാം. താഴെയുള്ള commandകൾ ഉപയോഗിച്ച് analysis നടത്തി, തുടർന്ന് ParaViewൽ ഫലം കാണാൻ step 04ലേക്ക് പോകുക.
cd tutorial/01_elastic_hinge
"$HOME/bin/fistr1"Binaryയും containerവും തുടർച്ചയായി update ചെയ്യുന്ന master / LATEST versionകൾ ഉപയോഗിക്കുന്നു. release versionകളും മറ്റ് environmentകളും download pageൽ കാണാം. മറ്റ് versionകളും environmentകളും
02
example download ചെയ്യുക
example ZIP download ചെയ്ത് extract ചെയ്യുക. 01_elastic_hinge folderലെ മൂന്ന് input fileകൾ ഉപയോഗിക്കുക.
extract ചെയ്ത 01_elastic_hinge folderൽ analysis നടത്തുക. command line വഴി extract ചെയ്യുമ്പോൾ macOS, Linux എന്നിവയിൽ unzip ഉപയോഗിക്കുക.
01_elastic_hinge/
hecmw_ctrl.dat- input, output fileകളുടെ സ്ഥാനം
hinge.cnt- material, load, restraint, analysis settingകൾ
hinge.msh- hinge mesh
command line വഴി example തയ്യാറാക്കാൻ, അത് സൂക്ഷിക്കേണ്ട സ്ഥലത്ത് നിന്ന് താഴെയുള്ള block മുഴുവനും പ്രവർത്തിപ്പിക്കുക. ഇത് archive download ചെയ്ത് extract ചെയ്ത് ശേഷം example folderലേക്ക് കടക്കും. അതേ terminalൽ analysis command തുടരാം.
Windows / PowerShell
curl.exe -fL -o 01_elastic_hinge.zip https://www.frontistr.com/sys/files/01_elastic_hinge.zip
if ($LASTEXITCODE -eq 0) {
  Expand-Archive -Path 01_elastic_hinge.zip -DestinationPath . -ErrorAction Stop
  cd 01_elastic_hinge
}
macOS / Linux
curl -fL -o 01_elastic_hinge.zip https://www.frontistr.com/sys/files/01_elastic_hinge.zip &&
unzip 01_elastic_hinge.zip &&
cd 01_elastic_hinge
03
example folder ൽ നിന്ന് run ചെയ്യുക
example folder 01_elastic_hingeൽ analysis നടത്തുക. hecmw_ctrl.dat അവിടെ ഉണ്ടെന്ന് ഉറപ്പാക്കുക.
Windows binary
example folderലുള്ള fistr1.exe double-click ചെയ്യുക. അതിനോടൊപ്പം വരുന്ന DLLകളും അതേ folderൽ വേണം. പ്രവർത്തനം അവസാനിക്കുമ്പോൾ window അടഞ്ഞാൽ example folderൽ എഴുതിയ ഫലങ്ങൾ ParaViewൽ തുറക്കുക.
log കാണാൻ
window ഉടൻ അടഞ്ഞ് ഫലം ഉണ്ടാകുന്നില്ലെങ്കിൽ, അല്ലെങ്കിൽ log പരിശോധിക്കണമെങ്കിൽ, example folderൽ PowerShell തുറന്ന് താഴെയുള്ളത് പ്രവർത്തിപ്പിക്കുക:
.\fistr1.exeDocker (Windows / macOS / Linux)
docker run --rm --platform linux/amd64 -v "${PWD}:/work" -w /work registry.gitlab.com/frontistr-commons/frontistr/fistr1:master fistr1example folderൽ terminal തുറന്ന് (Windowsൽ PowerShell) command പ്രവർത്തിപ്പിക്കുക. example folder containerയിലെ /workലേക്ക് mount ചെയ്യും. ഫലങ്ങൾ നിങ്ങളുടെ local example folderൽ save ചെയ്യും.
terminalൽ പ്രവർത്തിപ്പിക്കുമ്പോൾ logയുടെ അവസാനം താഴെയുള്ള message കണ്ടാൽ analysis പൂർത്തിയായി. വേണ്ട സമയം നിങ്ങളുടെ PC അനുസരിച്ച് മാറും.
FrontISTR Completed !!എന്തെങ്കിലും ശരിയായി പ്രവർത്തിക്കാത്ത പക്ഷം
input fileകൾ കാണുന്നില്ലെങ്കിൽ 01_elastic_hinge folderൽ നിന്ന് analysis നടത്തുകയാണോ എന്ന് പരിശോധിക്കുക. Windowsൽ fistr1.exeയും കൂടെ വരുന്ന എല്ലാ DLLകളും അതേ folderലേക്ക് copy ചെയ്തിട്ടുണ്ടോ എന്നും നോക്കുക.
04
ParaView ൽ ഫലം തുറക്കുക
ParaView install ചെയ്യുക. File → Open തിരഞ്ഞെടുക്കുകയും example folderലുള്ള താഴെയുള്ള file തുറക്കുകയും ചെയ്യുക.
hinge_vis_psf.0001.pvtuഫലങ്ങൾ അതേ 01_elastic_hinge folderൽ എഴുതപ്പെടുന്നു. സമീപത്തുള്ള hinge_vis_psf.0001 folderഉം ആവശ്യമാണ്; .pvtu file മാത്രം മാറ്റരുത്. 0000 ആരംഭാവസ്ഥയും 0001 load പ്രയോഗിച്ചതിന് ശേഷമുള്ള ഫലവും ആണ്.
സ്ക്രീൻ ഉദാഹരണം: macOSലെ ParaView 6.1.0. Windows, Linux എന്നിവയിലും അടിസ്ഥാന ഘട്ടങ്ങൾ ഒരുപോലെയാണ്.
-
04 / 1
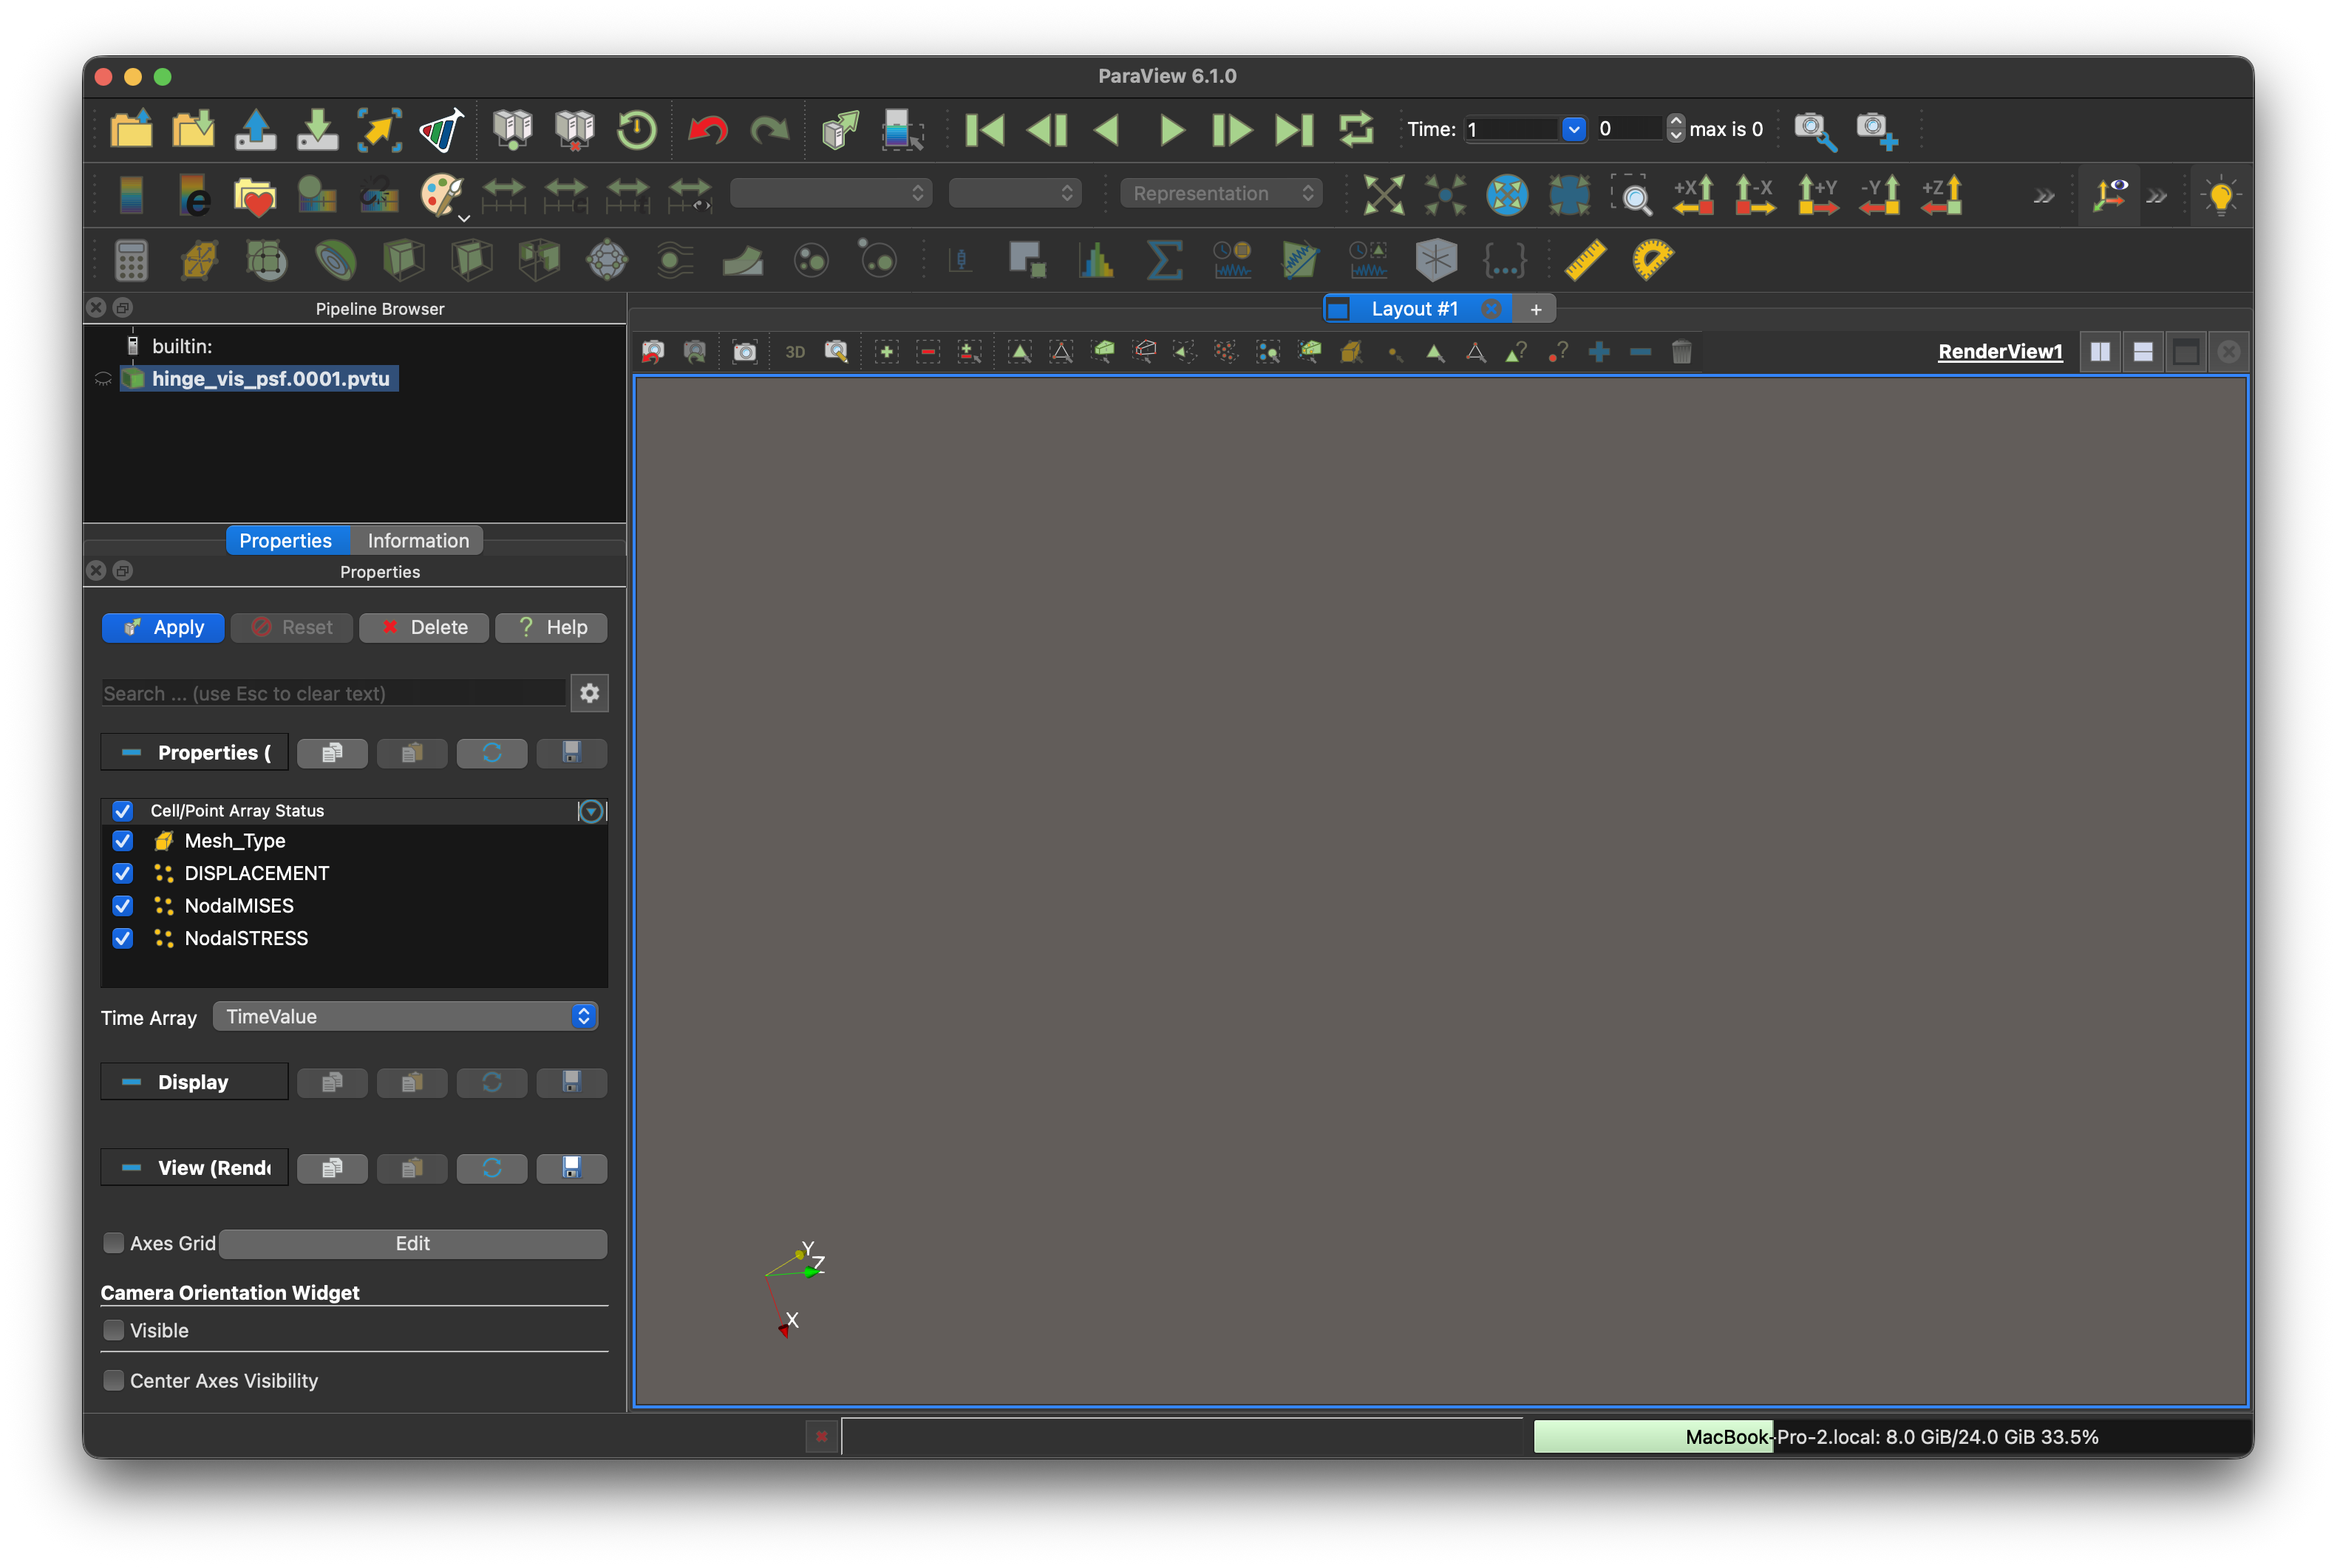
file തുറന്ന ഉടൻ കാണുന്ന ദൃശ്യം. ഇടതുവശത്തുള്ള Apply click ചെയ്യുക.
-
04 / 2
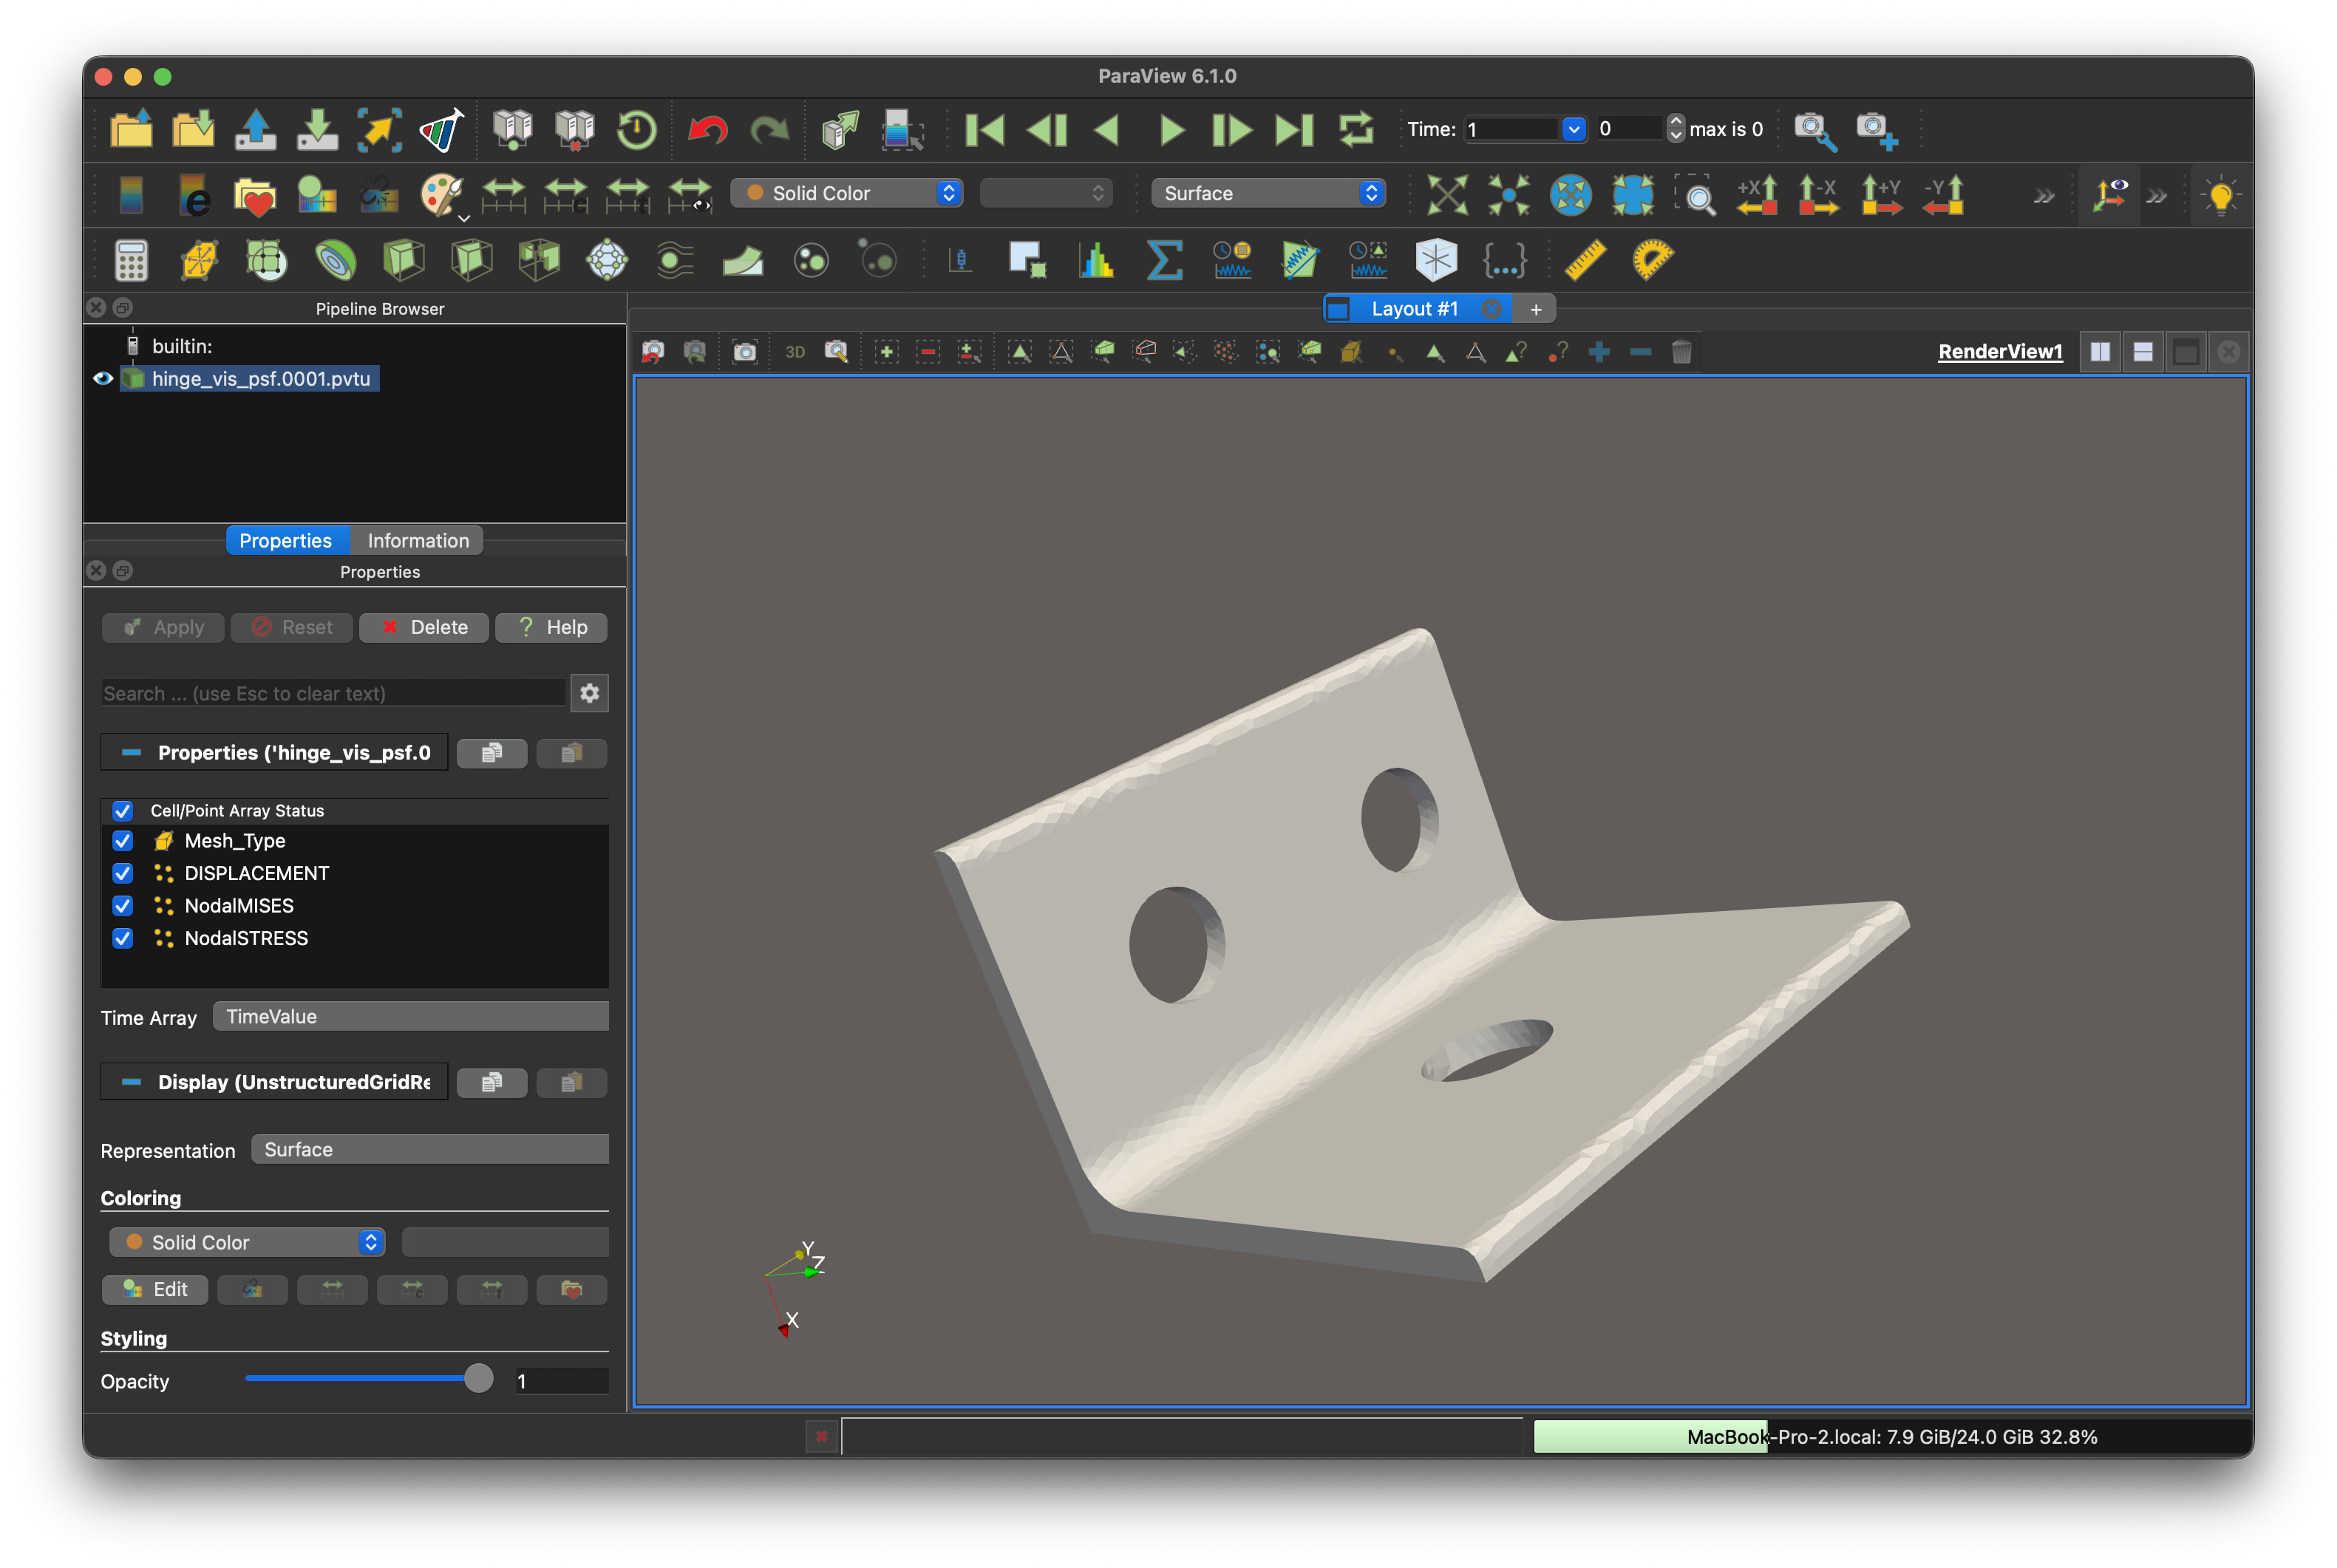
Apply click ചെയ്ത ശേഷം ഹിഞ്ചിന്റെ geometry കാണപ്പെടുന്നു.
-
04 / 3
മുകളിലെ toolbarൽ Solid Colorനെ NodalMISES ആക്കിയാൽ von Mises stress distribution കാണാം.
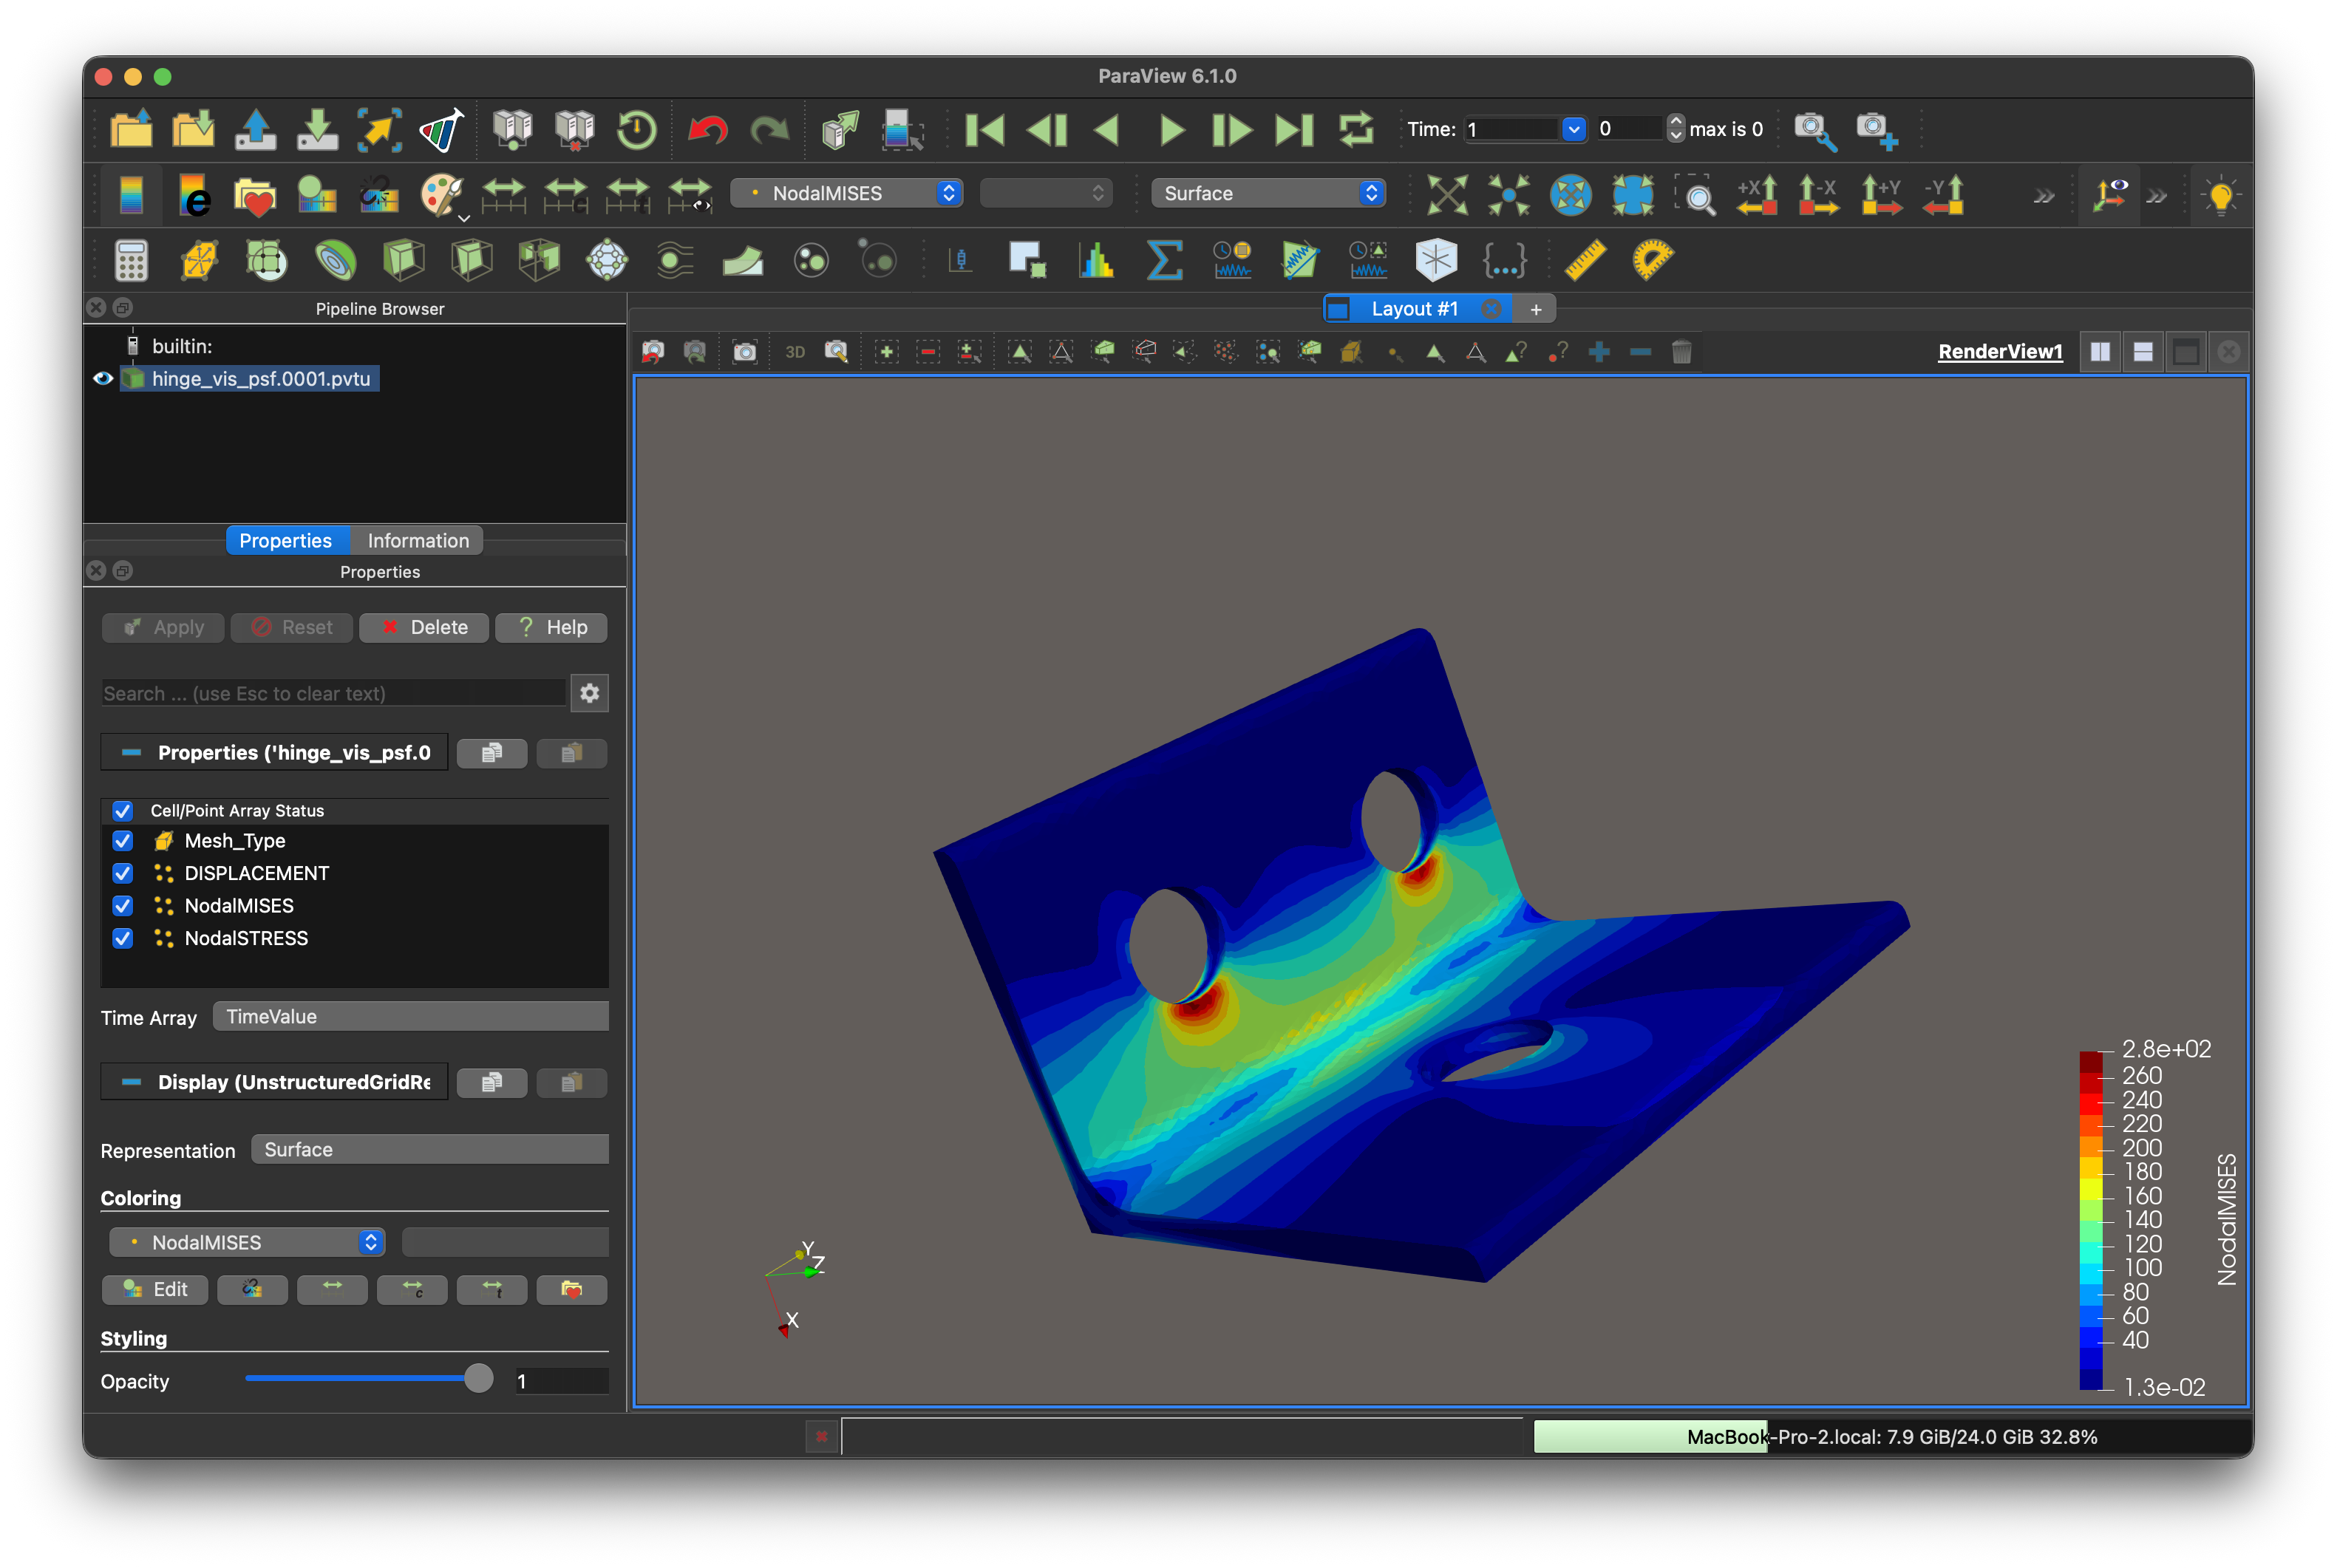
നിറങ്ങളും backgroundഉം ParaView settings അനുസരിച്ച് മാറാം; example ചിത്രവുമായി കൃത്യമായി ഒത്തിരിക്കേണ്ടതില്ല. model കാണുന്നില്ലെങ്കിൽ Reset Camera പരീക്ഷിക്കുക.
നിങ്ങളുടെ ആദ്യ analysis പൂർത്തിയായി
അടുത്തതായി exampleലുള്ള load, material settings എന്നിവ നോക്കുക. manual ഈ model വിശദീകരിക്കുകയും മറ്റു analysis രീതികൾ പരിചയപ്പെടുത്തുകയും ചെയ്യുന്നു.