FrontISTR / Getting Started
پیل کول
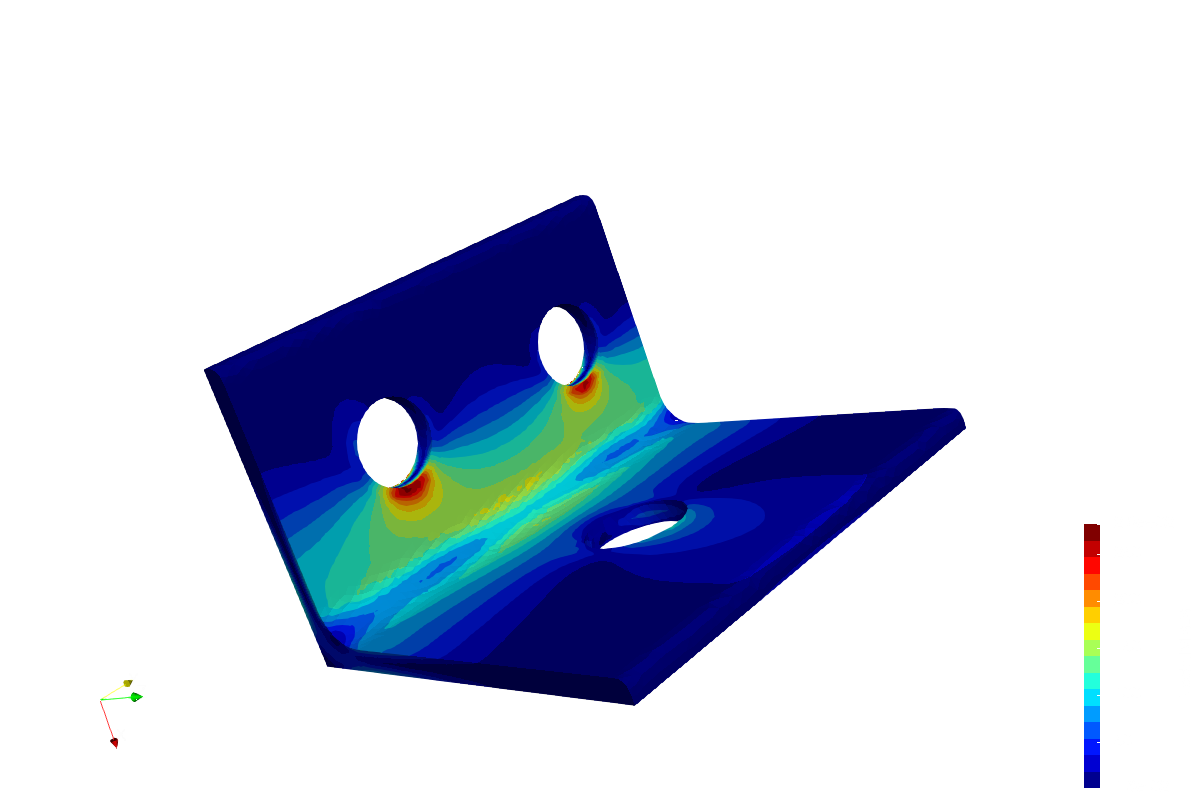
له FrontISTR سره د لولا تحلیل ترسره کړئ او بیا په ParaView کې د stress وېش وګورئ. که solver او چمتو example ولرئ، د لومړي ځل لپاره اړتیا نشته چې له mesh جوړولو پیل وکړئ.
01
Solver چمتو کړئ
Windows binary یا Docker image چمتو کړئ چې په Windows، macOS او Linux کې کار کوي.
Windows (64-bit)
ZIP extract کړئ. په بل ګام کې د example له چمتو کولو وروسته fistr1.exe او ټول ورسره DLL فایلونه example folder (01_elastic_hinge) ته copy کړئ.
Docker (Windows / macOS / Linux)
Docker پیل کړئ او لاندې command په terminal کې اجرا کړئ. په Windows کې Docker د Linux container mode کې وکاروئ او command په PowerShell کې اجرا کړئ.
docker pull --platform linux/amd64 registry.gitlab.com/frontistr-commons/frontistr/fistr1:masterاوسنی رسمي image د amd64 لپاره build شوی دی. په Apple Silicon Mac کې د emulation له لارې اجرا کېږي، نو ښايي ډېر وخت ونیسي.
له source code څخه build
تاسو کولی شئ FrontISTR په دغو operating systemونو کې له source code څخه هم پخپله build کړئ. کله چې compiler او اړین library نصب شي، CMake environment پېژني او build configure کوي.
د خپل distribution لپاره لاندې commandونو سره بنسټیز tools نصب کړئ. له موجود development environment څخه کار اخیستلای شئ او د پیل لپاره MPI یا نور optional library نه دي اړین.
Ubuntu / Debian
sudo apt-get update
sudo apt-get install build-essential cmake git gfortran
RHEL / Rocky Linux / AlmaLinux
sudo dnf install gcc gcc-c++ gcc-gfortran make cmake gitلاندې commandونه په macOS او Linux کې د build او install مثال دي. executable فایلونه د home directory لاندې bin ته ځي، نو sudo یا د PATH بدلون ته اړتیا نشته. د macOS/Windows د چمتووالي او optional library لپاره build guide وګورئ.
git clone https://gitlab.com/FrontISTR-Commons/FrontISTR.git
cd FrontISTR
cmake -S . -B build -DCMAKE_BUILD_TYPE=Release -DCMAKE_INSTALL_PREFIX="$HOME"
cmake --build build --parallel
cmake --install build
له پکې شامل example څخه بې له بیا download څخه مستقیم کار اخیستلای شئ. په لاندې commandونو analysis اجرا کړئ او بیا step 04 ته ولاړ شئ څو result په ParaView کې وګورئ.
cd tutorial/01_elastic_hinge
"$HOME/bin/fistr1"Binary او container د تل update کېدونکو master / LATEST versionونو څخه کار اخلي. د release versionونو او نورو environmentونو لپاره download page وګورئ. نور versionونه او environmentونه
02
Example download کړئ
د example ZIP download او extract کړئ. د 01_elastic_hinge folder دننه درې input file وکاروئ.
Analysis په extract شوي 01_elastic_hinge folder کې اجرا کړئ. که د command line له لارې extract کوئ، په macOS او Linux کې unzip وکاروئ.
01_elastic_hinge/
hecmw_ctrl.dat- د input او output file ځایونه
hinge.cnt- Material، load، restraint او analysis setting
hinge.msh- Hinge mesh
که example د command line له لارې چمتو کوئ، لاندې ټول block په هغه ځای کې اجرا کړئ چې غواړئ example وساتئ. archive download او extract کېږي او example folder ته ننوځي. له هماغه terminal څخه analysis command ته دوام ورکړئ.
Windows / PowerShell
curl.exe -fL -o 01_elastic_hinge.zip https://www.frontistr.com/sys/files/01_elastic_hinge.zip
if ($LASTEXITCODE -eq 0) {
  Expand-Archive -Path 01_elastic_hinge.zip -DestinationPath . -ErrorAction Stop
  cd 01_elastic_hinge
}
macOS / Linux
curl -fL -o 01_elastic_hinge.zip https://www.frontistr.com/sys/files/01_elastic_hinge.zip &&
unzip 01_elastic_hinge.zip &&
cd 01_elastic_hinge
03
له example folder څخه run کړئ
Analysis په example folder (01_elastic_hinge) کې اجرا کړئ. ډاډ ترلاسه کړئ چې hecmw_ctrl.dat په همدې folder کې شته.
Windows binary
په example folder کې fistr1.exe double-click کړئ. ورسره DLL فایلونه هم باید په همدې folder کې وي. که اجرا په پای کې window وتړل شي، هغه result چې example folder ته لیکل شوی په ParaView کې پرانیزئ.
د log د کتلو لپاره
که window سمدستي وتړل شي او result جوړ نه شي، یا غواړئ log وګورئ، په example folder کې PowerShell پرانیزئ او لاندې اجرا کړئ.
.\fistr1.exeDocker (Windows / macOS / Linux)
docker run --rm --platform linux/amd64 -v "${PWD}:/work" -w /work registry.gitlab.com/frontistr-commons/frontistr/fistr1:master fistr1په example folder کې terminal (په Windows کې PowerShell) پرانیزئ او command اجرا کړئ. Example folder په container کې /work ته mount کېږي او result ستاسو په local example folder کې ساتل کېږي.
که په terminal کې اجرا کوئ، د log په پای کې لاندې message ښيي چې analysis بشپړ شوی. وخت ستاسو په PC پورې اړه لري.
FrontISTR Completed !!که ستونزه وي
که input file ونه موندل شي، وګورئ چې analysis له 01_elastic_hinge folder څخه اجرا کوئ. په Windows کې دا هم وګورئ چې fistr1.exe او ټول ورسره DLL فایلونه همدې folder ته copy شوي دي.
04
Result په ParaView کې پرانیزئ
ParaView نصب کړئ. File → Open وټاکئ او په example folder کې لاندې file پرانیزئ.
hinge_vis_psf.0001.pvtuResult په همدې 01_elastic_hinge folder کې لیکل کېږي. د څنګ hinge_vis_psf.0001 folder هم اړین دی، نو .pvtu file یوازې مه لېږدوئ. 0000 initial state دی او 0001 د load له لګولو وروسته result دی.
د سکرین بېلګه: ParaView 6.1.0 په macOS کې. بنسټیز ګامونه په Windows او Linux کې هم یو شان دي.
-
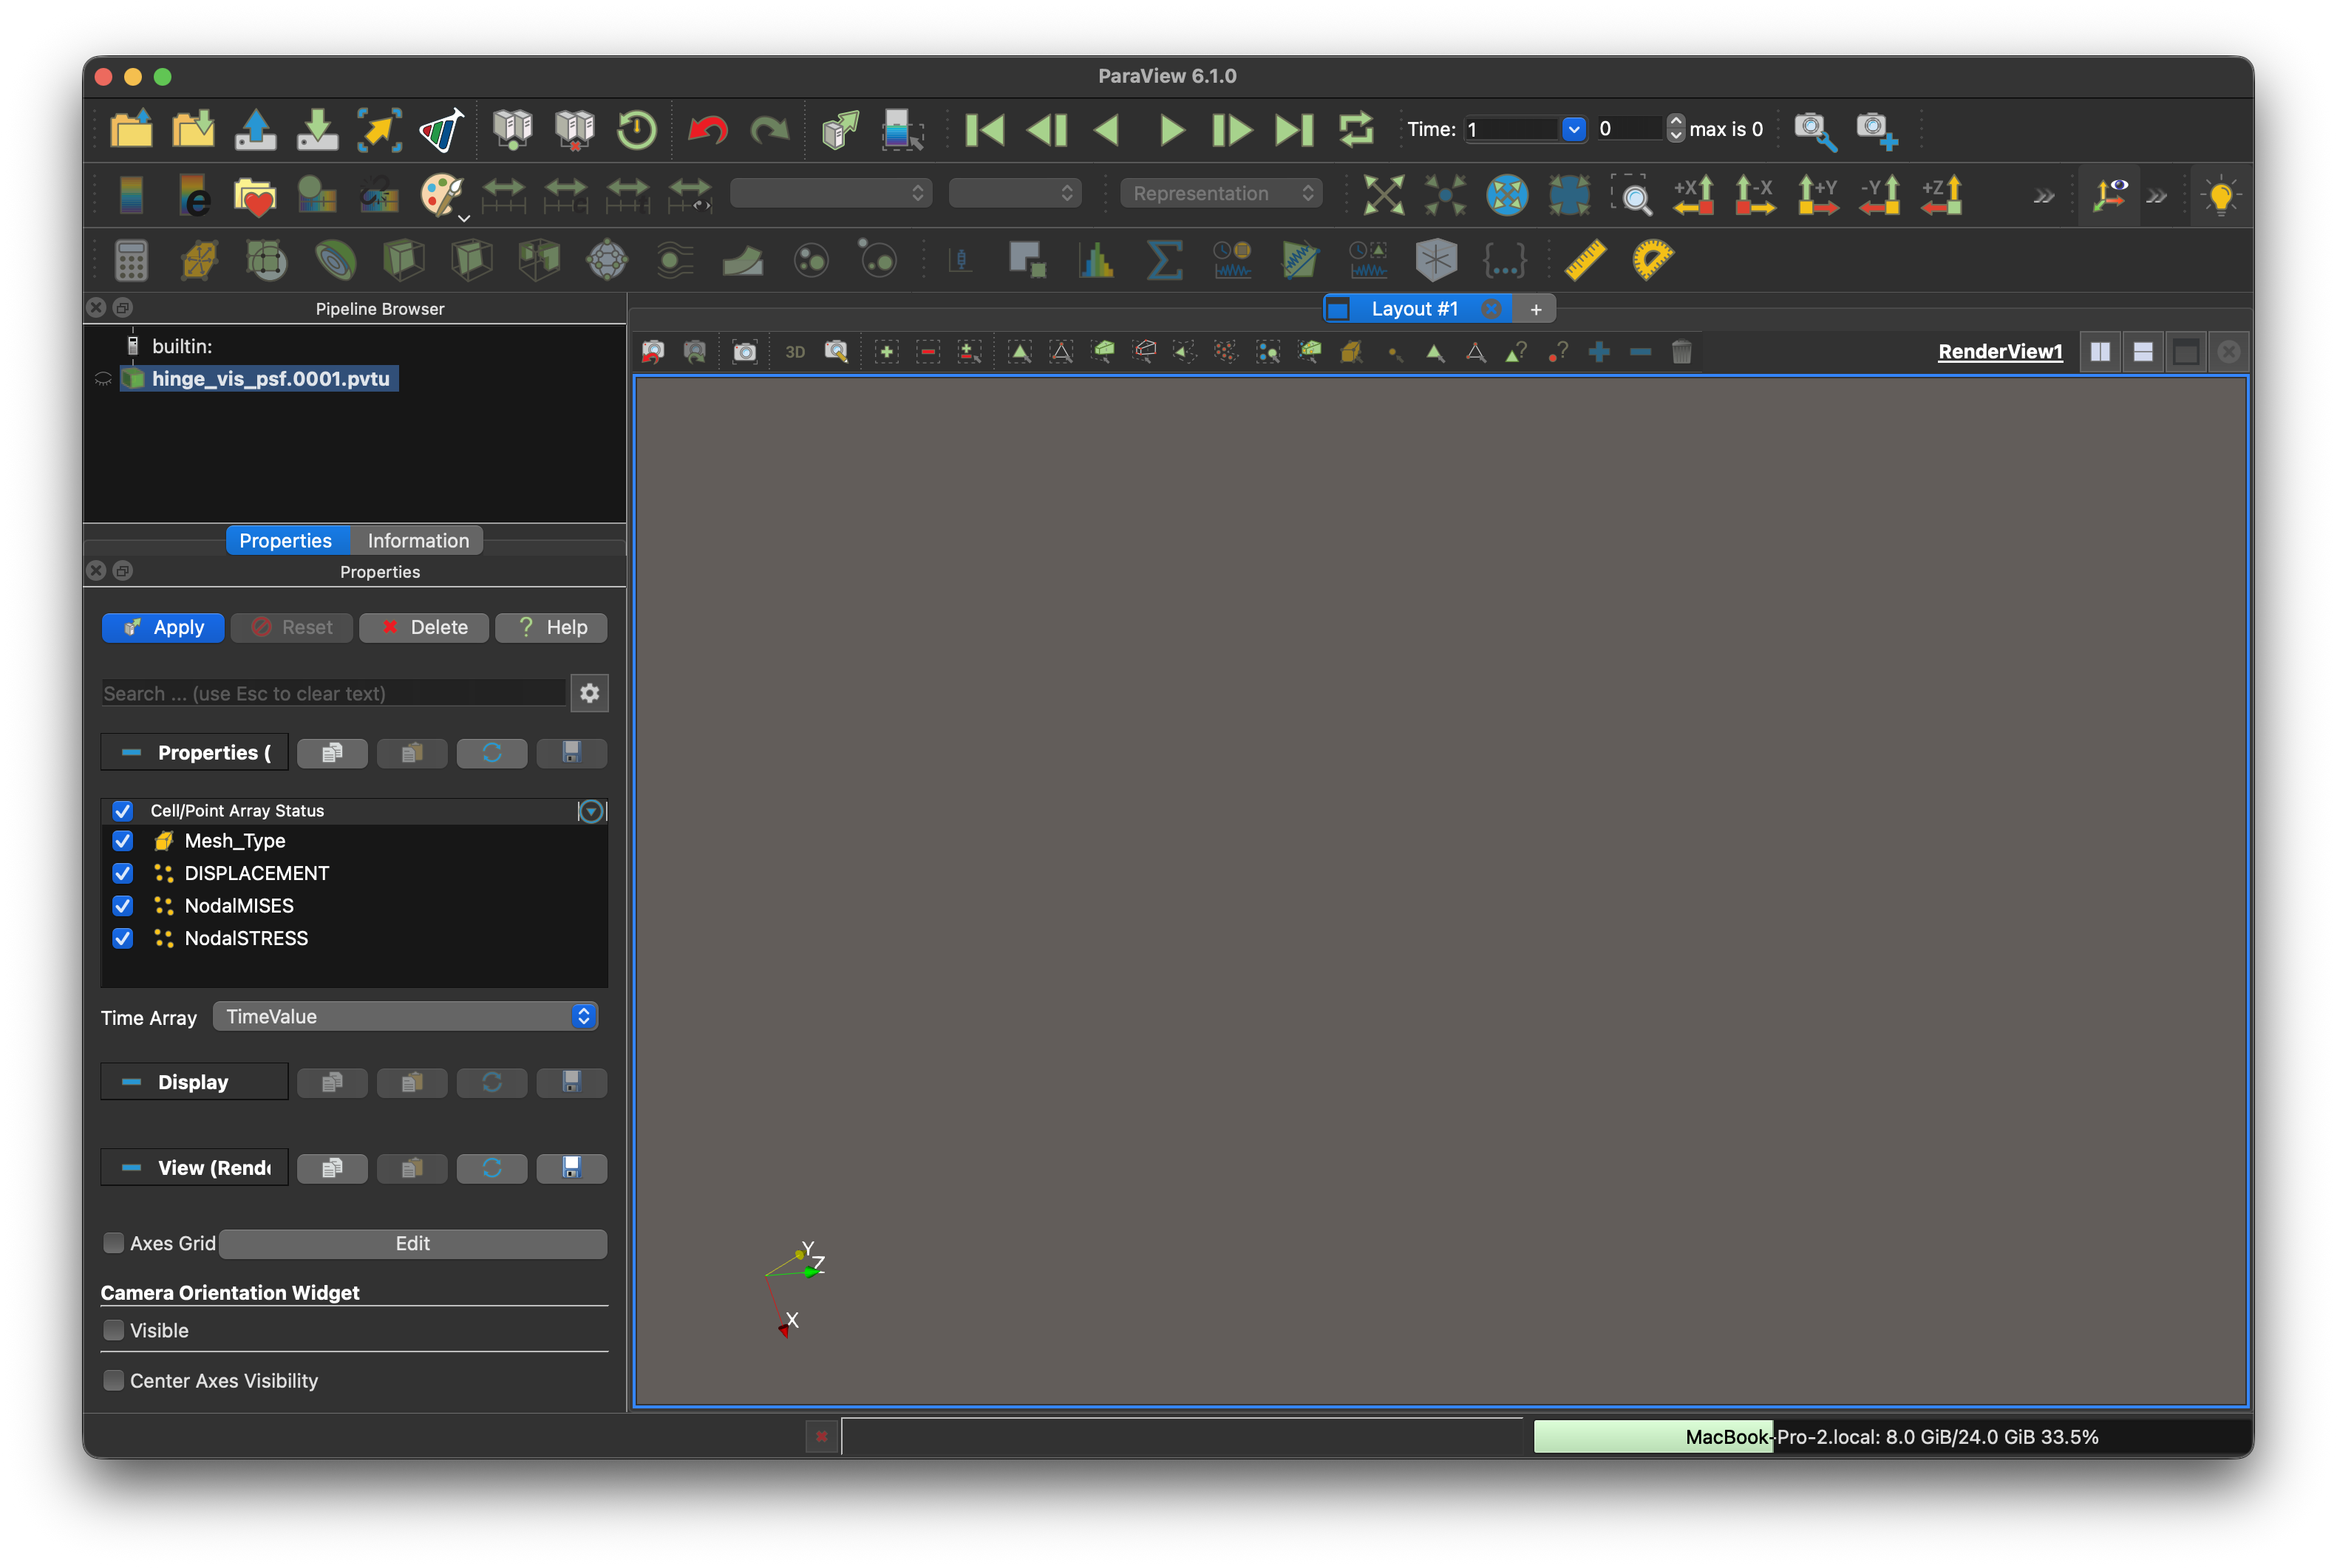
04 / 1
د file له پرانیستلو سمدستي وروسته. په چپ اړخ کې Apply click کړئ.
-
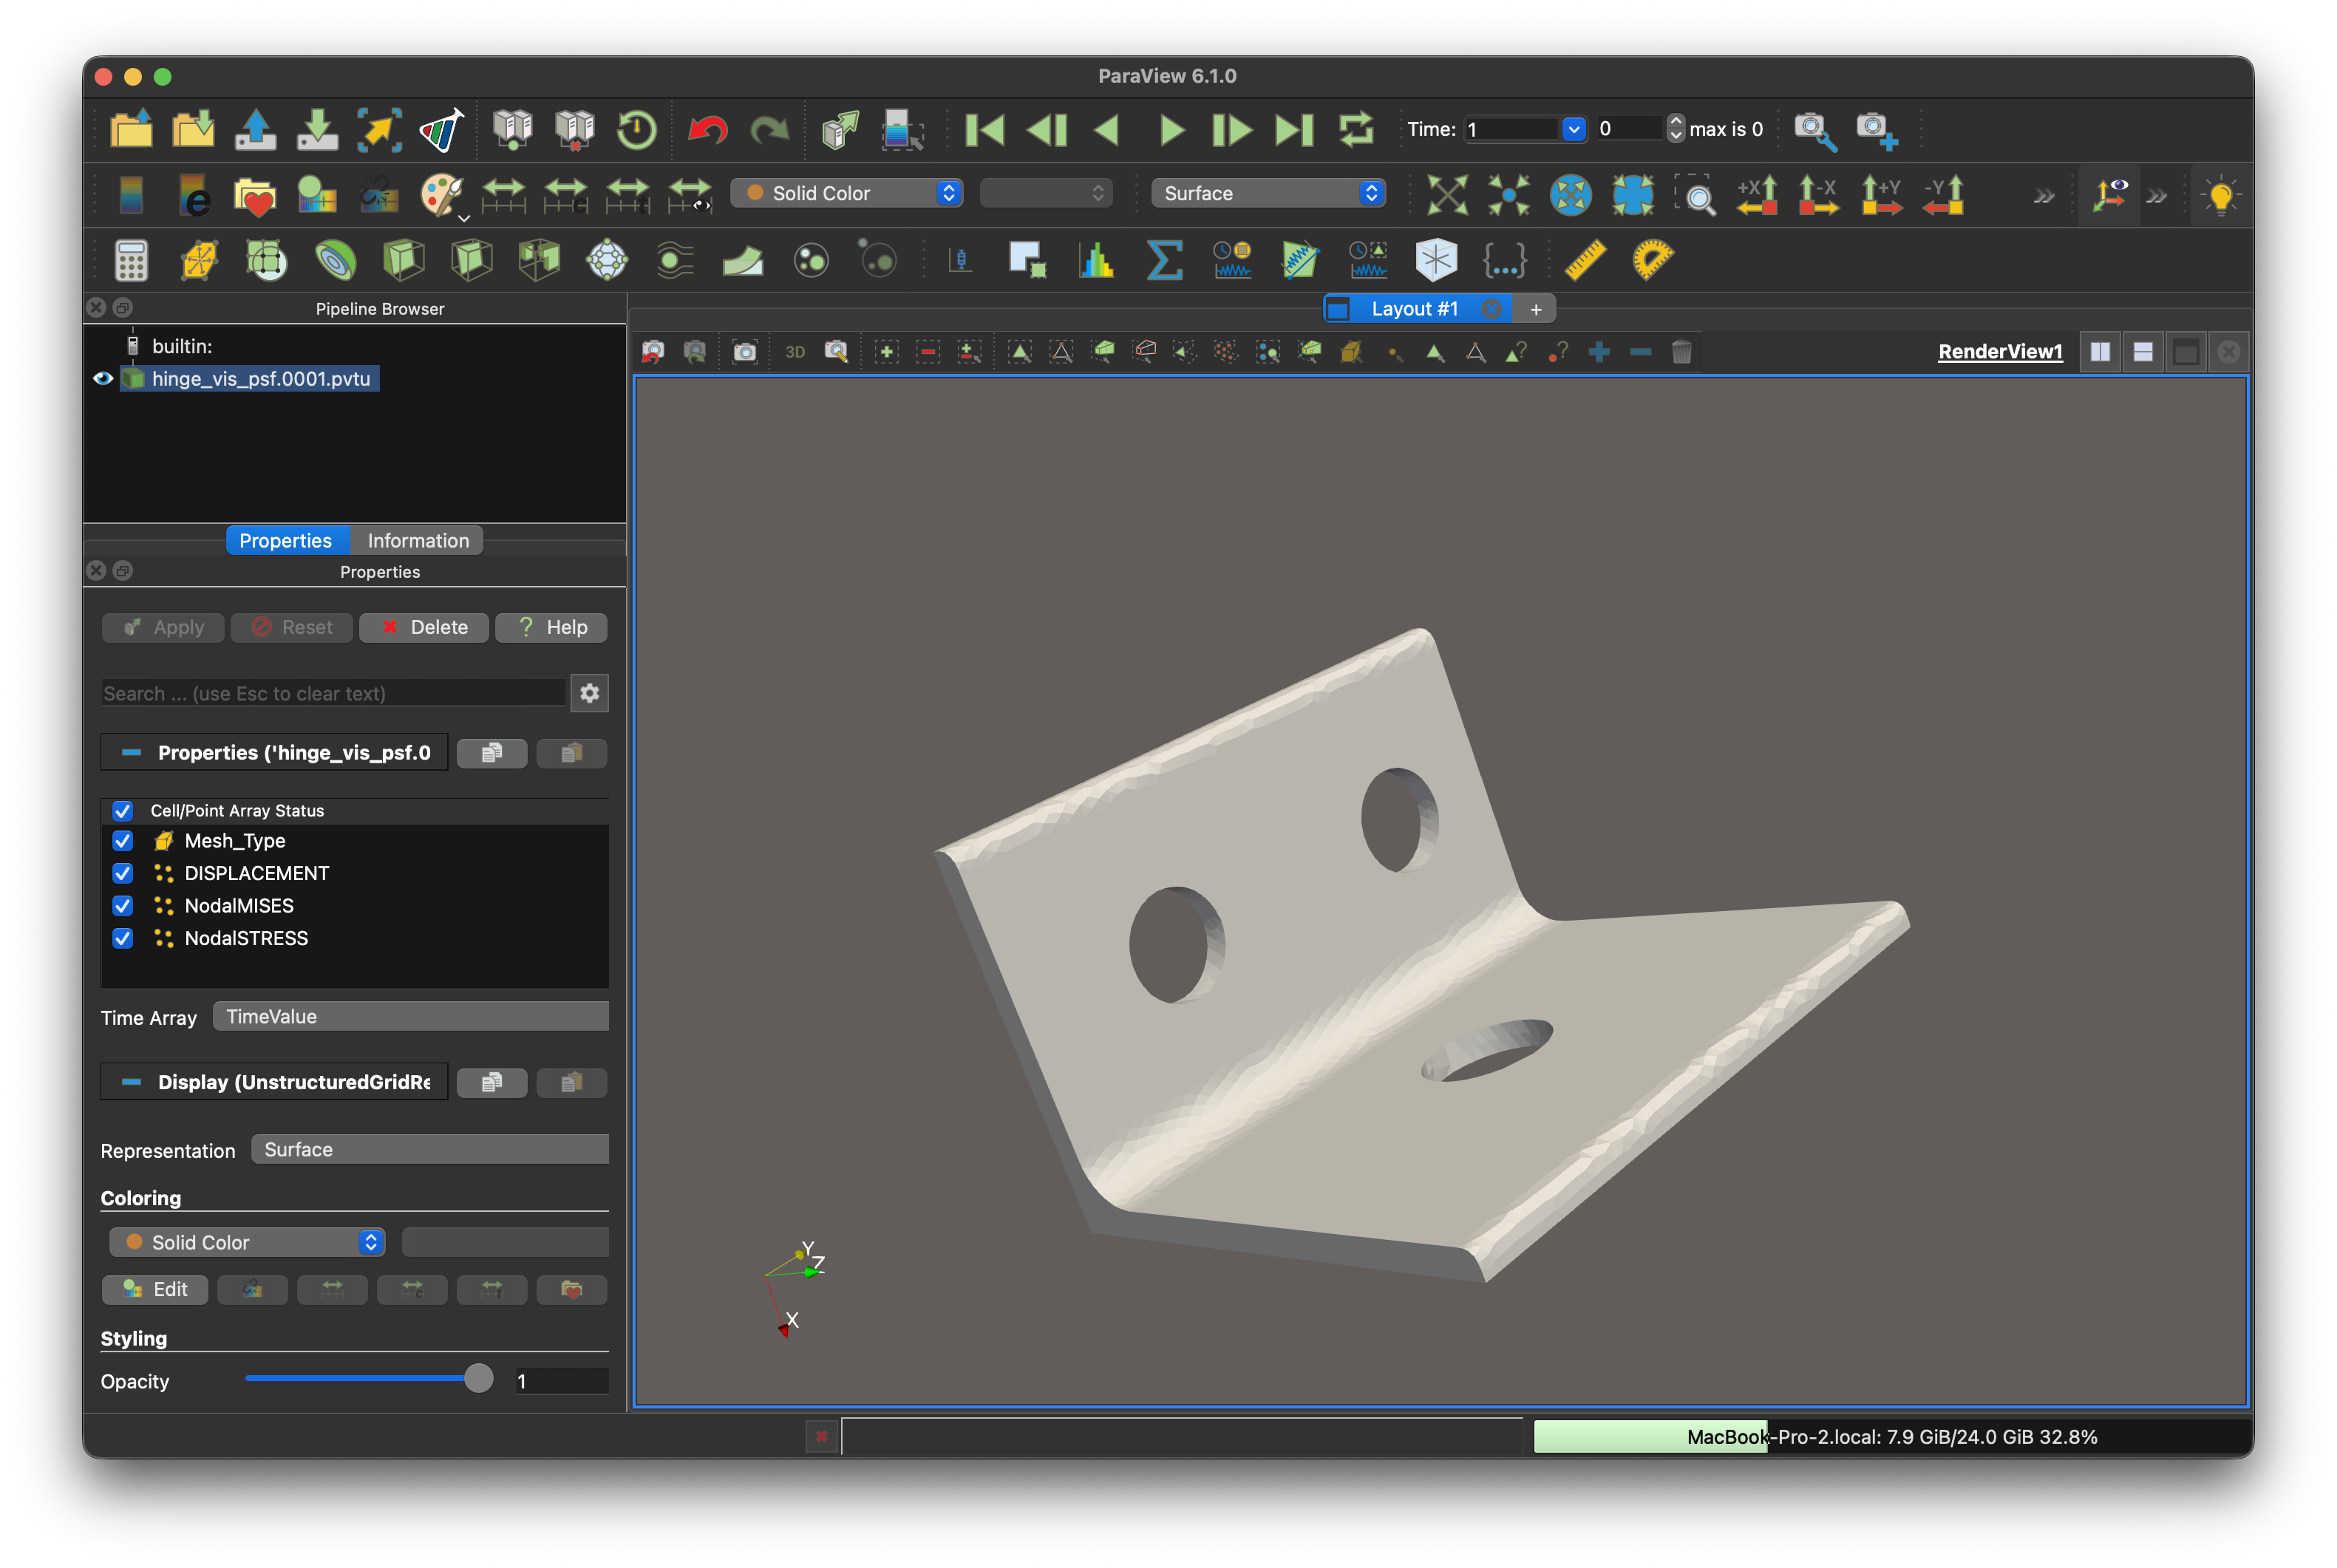
04 / 2
له Apply click کولو وروسته د لولا geometry ښکاره کېږي.
-
04 / 3
په پورته toolbar کې Solid Color په NodalMISES بدل کړئ څو د von Mises stress وېش ښکاره شي.
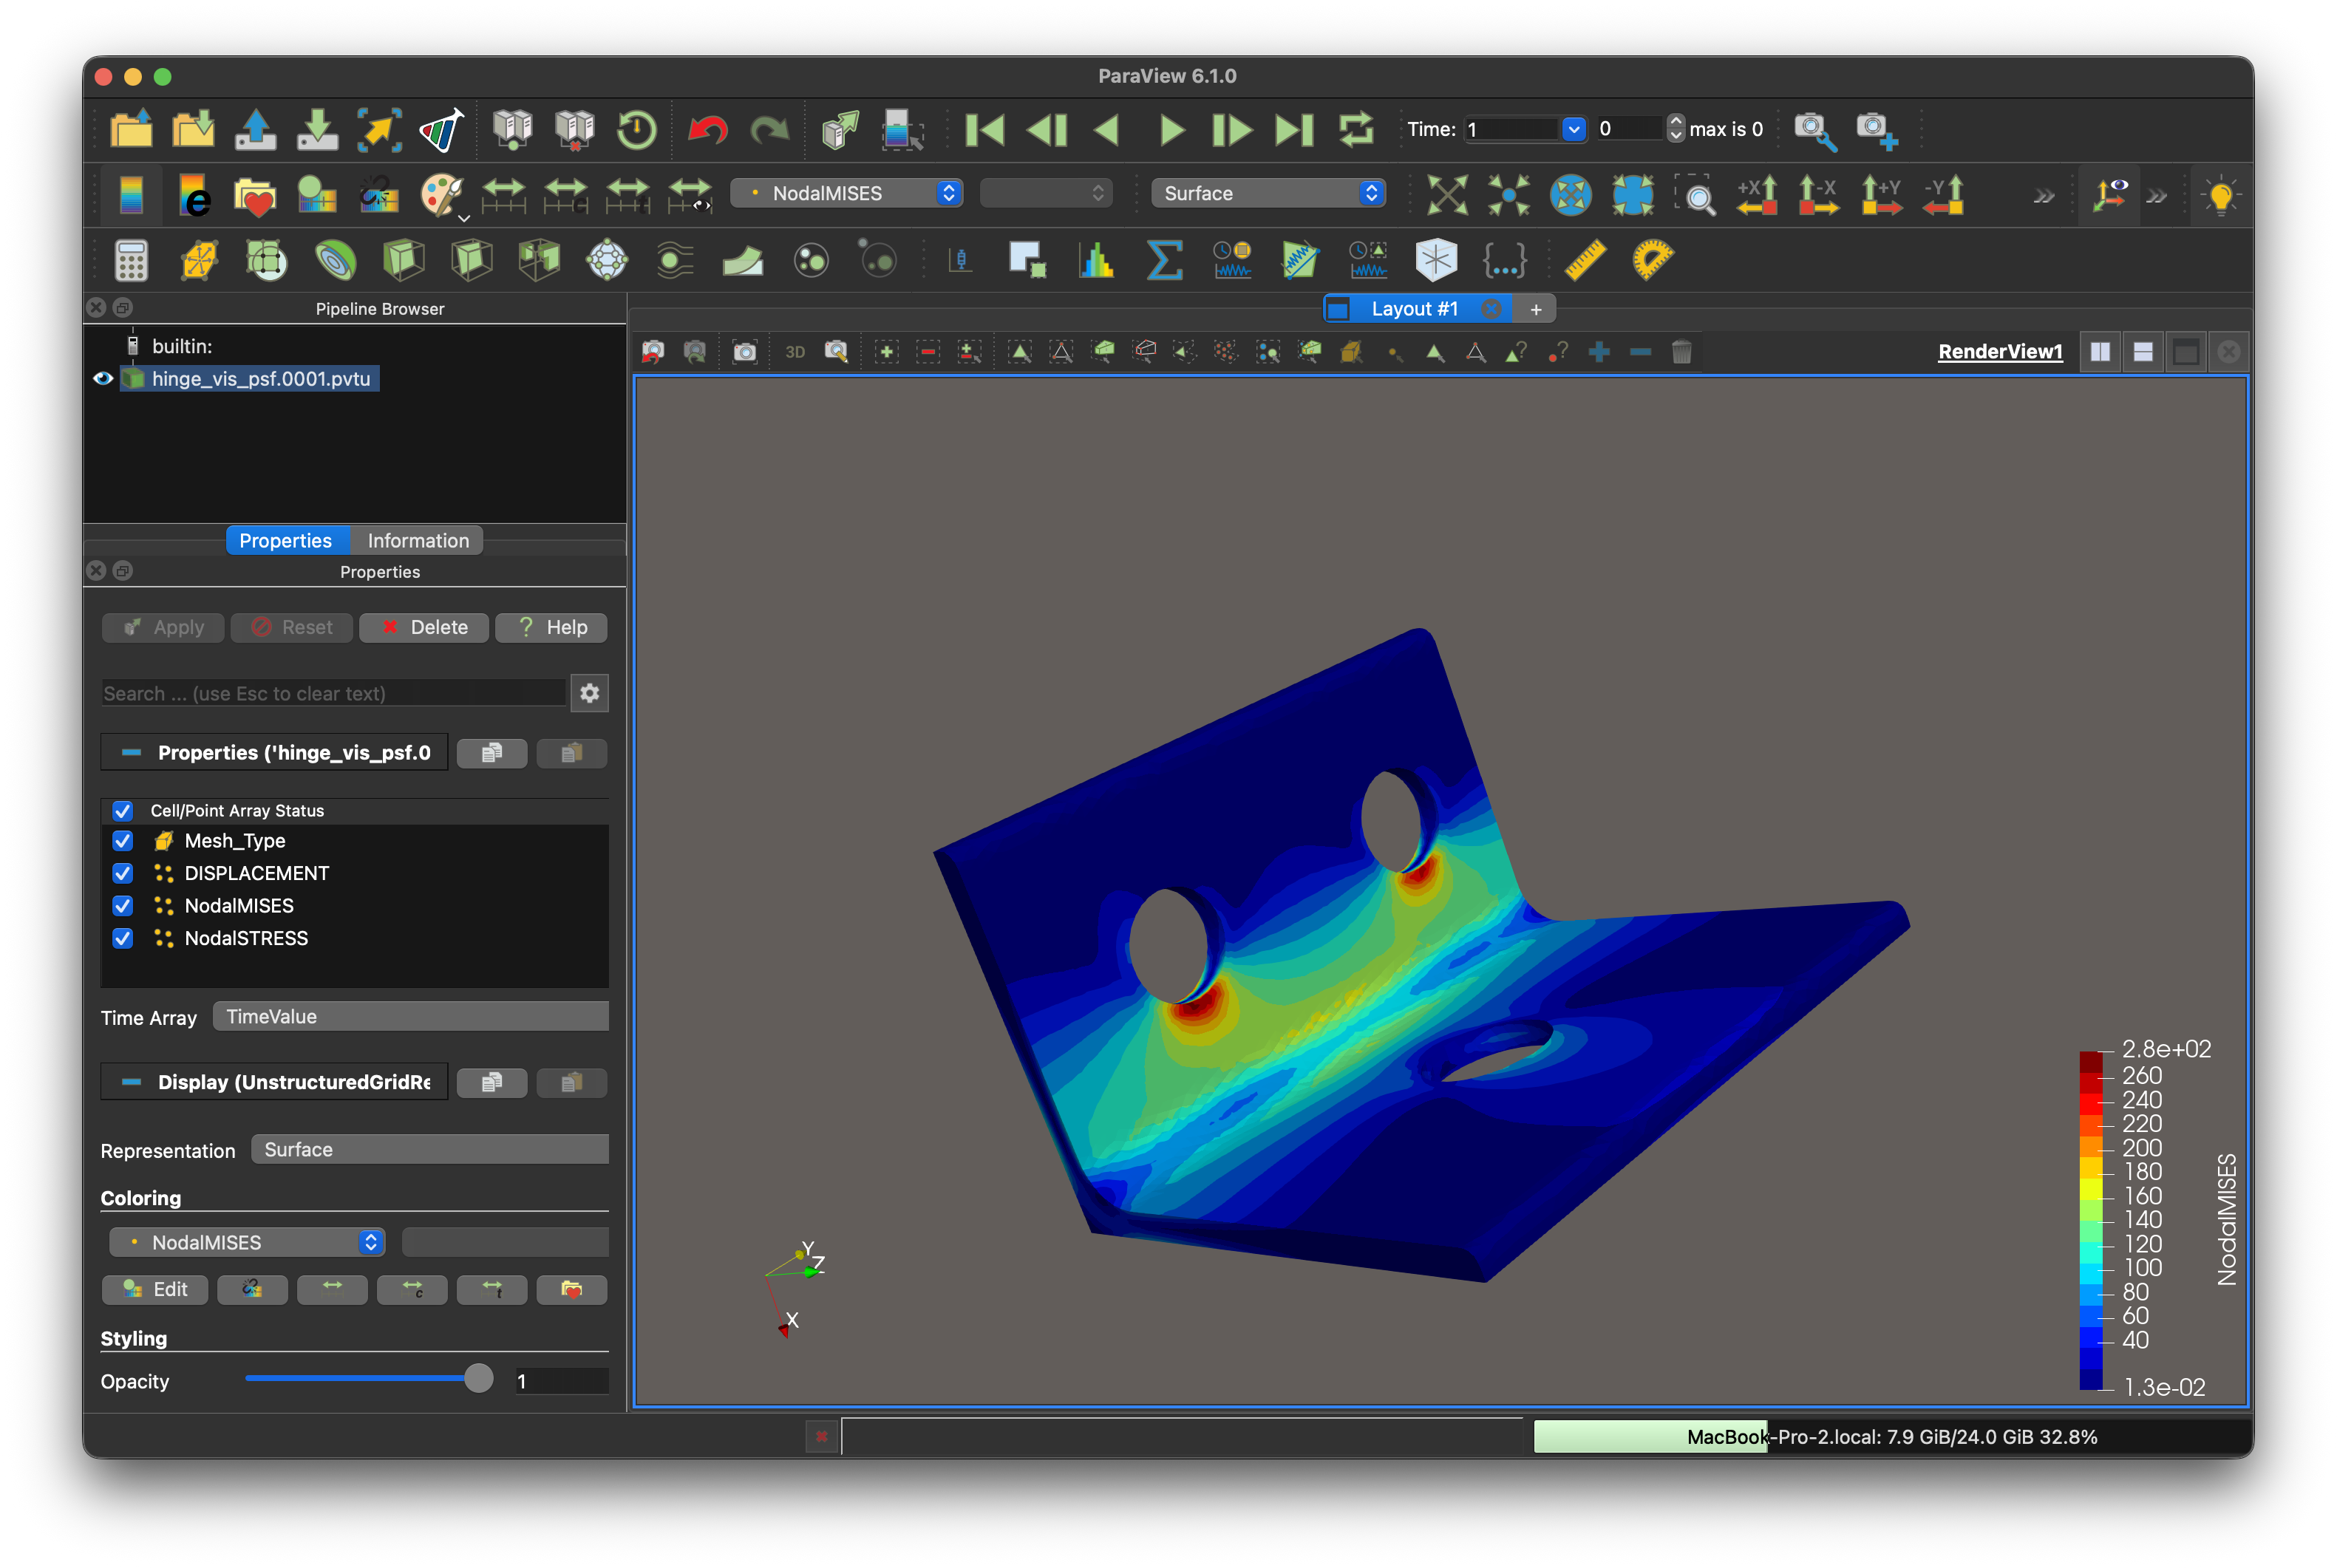
Color او background د ParaView setting پورې تړلي دي او اړتیا نشته له sample سره یو شان وي. که model نه ښکاري، Reset Camera وازمویئ.
ستاسو لومړی analysis بشپړ شو
وروسته د example load او material settings وګورئ. manual دغه model او نور analysis typeونه تشریح کوي.