FrontISTR / Getting Started
首次分析
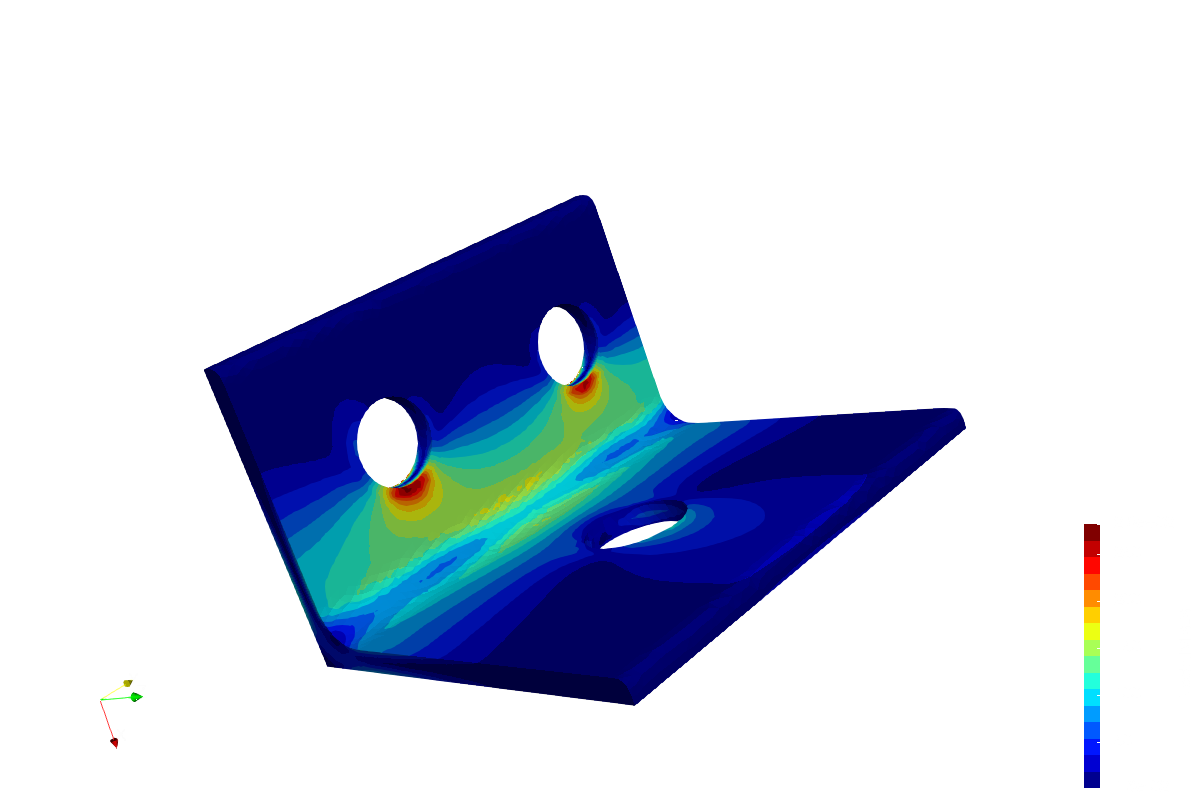
使用 FrontISTR 分析一個鉸鏈,接著在 ParaView 中查看應力分布。只要準備好求解器與範例,第一次操作不必從建立網格開始。
01
準備求解器
準備 Windows 二進位檔,或可在 Windows、macOS 與 Linux 使用的 Docker 映像檔。
Windows(64-bit)
解壓縮 ZIP。下一步準備好範例後,請將 fistr1.exe 與隨附的所有 DLL 複製到範例資料夾(01_elastic_hinge)中。
Docker(Windows / macOS / Linux)
啟動 Docker,然後在終端機執行以下指令。在 Windows 上,請將 Docker 設為 Linux 容器模式,並使用 PowerShell 執行指令。
docker pull --platform linux/amd64 registry.gitlab.com/frontistr-commons/frontistr/fistr1:master目前官方映像檔是為 amd64 建置的。在 Apple Silicon Mac 上會透過模擬執行,因此可能需要較長時間。
從原始碼建置
您也可以在上述任何作業系統中自行從原始碼建置 FrontISTR。安裝編譯器與必要函式庫後,CMake 會偵測環境並設定建置。
請依照您的發行版使用下列指令安裝基本工具。可以直接使用現有的開發環境,不必先安裝 MPI 等額外函式庫。
Ubuntu / Debian
sudo apt-get update
sudo apt-get install build-essential cmake git gfortran
RHEL / Rocky Linux / AlmaLinux
sudo dnf install gcc gcc-c++ gcc-gfortran make cmake git以下是在 macOS 與 Linux 上建置及安裝的範例。執行檔會安裝到家目錄下的 bin,因此不需要 sudo,也不必修改 PATH。macOS/Windows 的環境準備與額外函式庫請參閱建置指南。
git clone https://gitlab.com/FrontISTR-Commons/FrontISTR.git
cd FrontISTR
cmake -S . -B build -DCMAKE_BUILD_TYPE=Release -DCMAKE_INSTALL_PREFIX="$HOME"
cmake --build build --parallel
cmake --install build
可以直接執行隨附的範例,不必再次下載。用下列指令執行分析後,請前往步驟 04,在 ParaView 中查看結果。
cd tutorial/01_elastic_hinge
"$HOME/bin/fistr1"二進位檔與容器使用持續更新的 master / LATEST 版本。發行版本與其他環境請參閱下載頁面。 其他版本與環境
02
下載範例
下載並解壓縮範例 ZIP。使用 01_elastic_hinge 資料夾中的三個輸入檔案。
請在解壓縮後的 01_elastic_hinge 資料夾中執行分析。若以指令解壓縮,macOS 與 Linux 使用 unzip。
01_elastic_hinge/
hecmw_ctrl.dat- 輸入與輸出檔案位置
hinge.cnt- 材料、荷重、拘束與分析設定
hinge.msh- 鉸鏈網格
若要用指令準備範例,請在想要存放範例的位置一次執行下方整個區塊。它會下載並解壓縮檔案,然後進入範例資料夾。接著可在同一個終端機直接執行分析指令。
Windows / PowerShell
curl.exe -fL -o 01_elastic_hinge.zip https://www.frontistr.com/sys/files/01_elastic_hinge.zip
if ($LASTEXITCODE -eq 0) {
  Expand-Archive -Path 01_elastic_hinge.zip -DestinationPath . -ErrorAction Stop
  cd 01_elastic_hinge
}
macOS / Linux
curl -fL -o 01_elastic_hinge.zip https://www.frontistr.com/sys/files/01_elastic_hinge.zip &&
unzip 01_elastic_hinge.zip &&
cd 01_elastic_hinge
03
在範例資料夾中執行
在範例資料夾(01_elastic_hinge)中執行分析。請確認該資料夾內有 hecmw_ctrl.dat。
Windows 二進位檔
在範例資料夾中按兩下 fistr1.exe。隨附的 DLL 也必須放在同一個資料夾。如果執行結束時視窗關閉,請用 ParaView 開啟寫入範例資料夾的結果。
查看記錄
如果視窗立即關閉且沒有產生結果,或您想查看記錄,請在範例資料夾開啟 PowerShell 並執行:
.\fistr1.exeDocker(Windows / macOS / Linux)
docker run --rm --platform linux/amd64 -v "${PWD}:/work" -w /work registry.gitlab.com/frontistr-commons/frontistr/fistr1:master fistr1在範例資料夾中開啟終端機(Windows 使用 PowerShell)並執行指令。範例資料夾會掛載到容器內的 /work,結果則儲存在本機的範例資料夾中。
若在終端機中執行,記錄最後出現以下訊息即表示分析完成。執行時間會依電腦而異。
FrontISTR Completed !!如果無法正常執行
如果找不到輸入檔案,請確認您是在 01_elastic_hinge 資料夾中執行分析。在 Windows 上,也請確認 fistr1.exe 與隨附的所有 DLL 都已複製到同一個資料夾。
04
在 ParaView 中開啟結果
安裝 ParaView。選擇 File → Open,開啟範例資料夾中的下列檔案。
hinge_vis_psf.0001.pvtu結果會輸出到同一個 01_elastic_hinge 資料夾。旁邊的 hinge_vis_psf.0001 資料夾也必須保留,因此不要只移動 .pvtu 檔案。0000 是初始狀態,0001 是施加荷重後的結果。
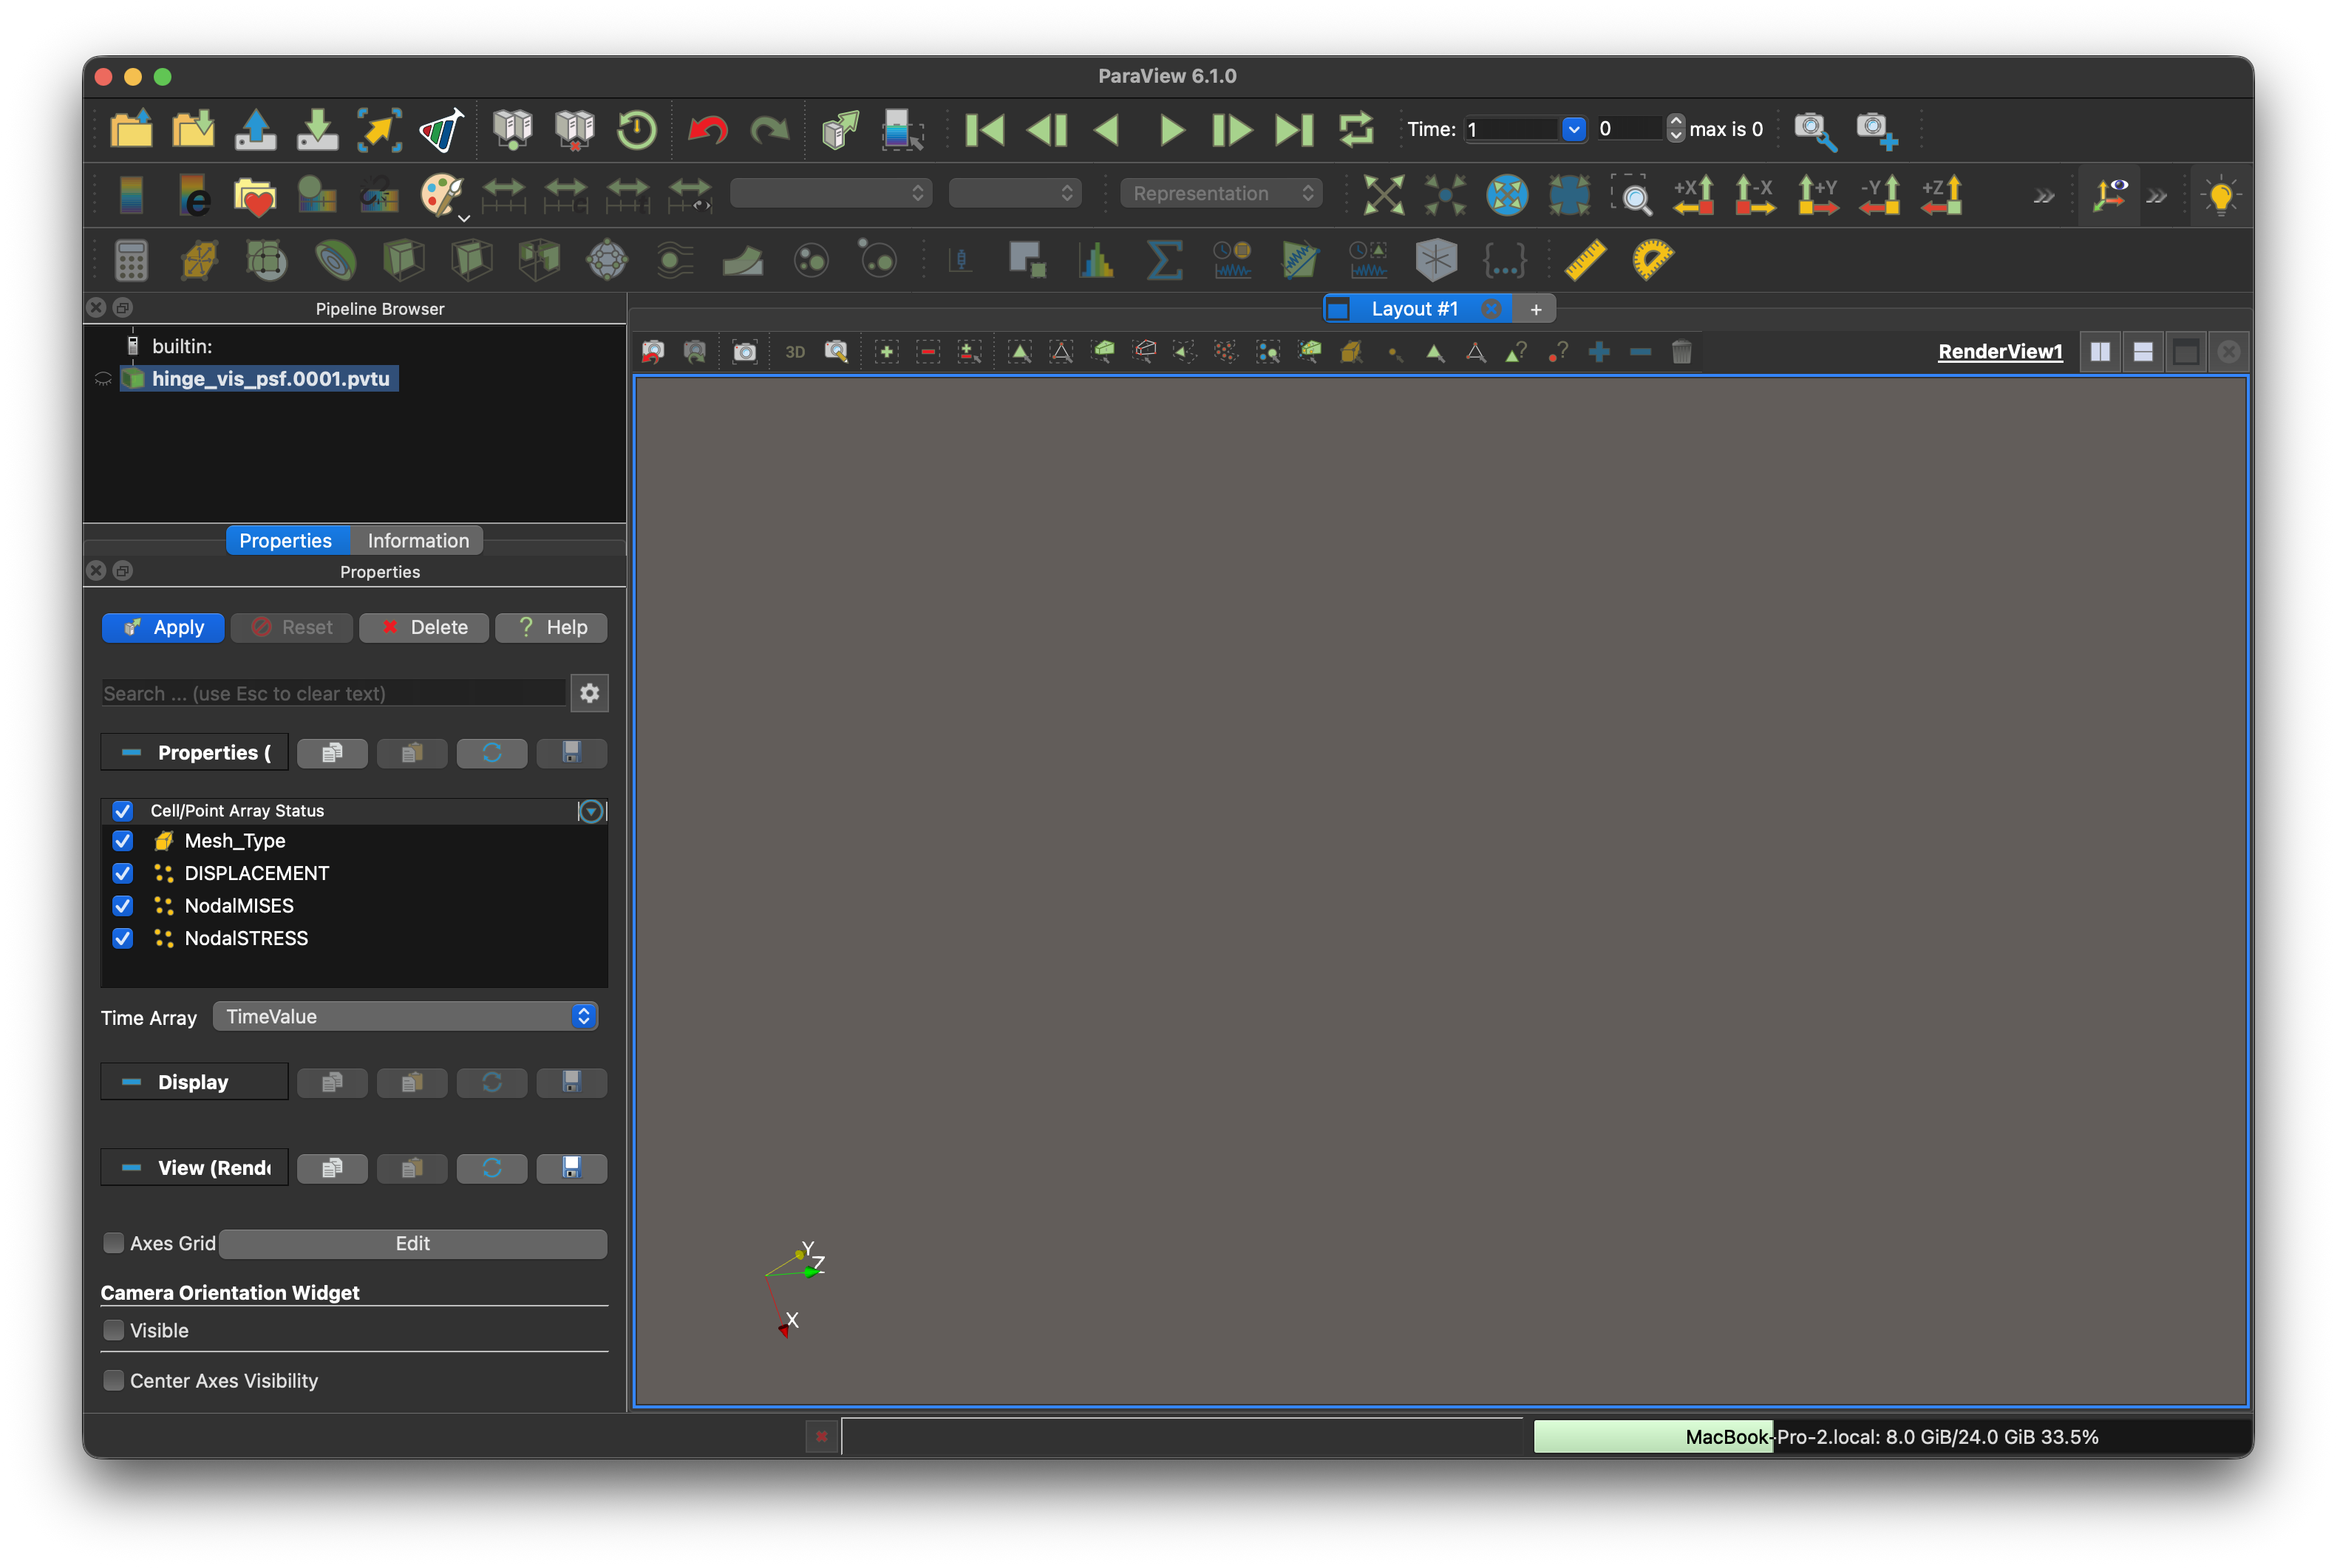
畫面範例:macOS 上的 ParaView 6.1.0。Windows 與 Linux 的基本操作相同。
-
04 / 1
剛開啟檔案時的畫面。按一下左側的 Apply。
-
04 / 2
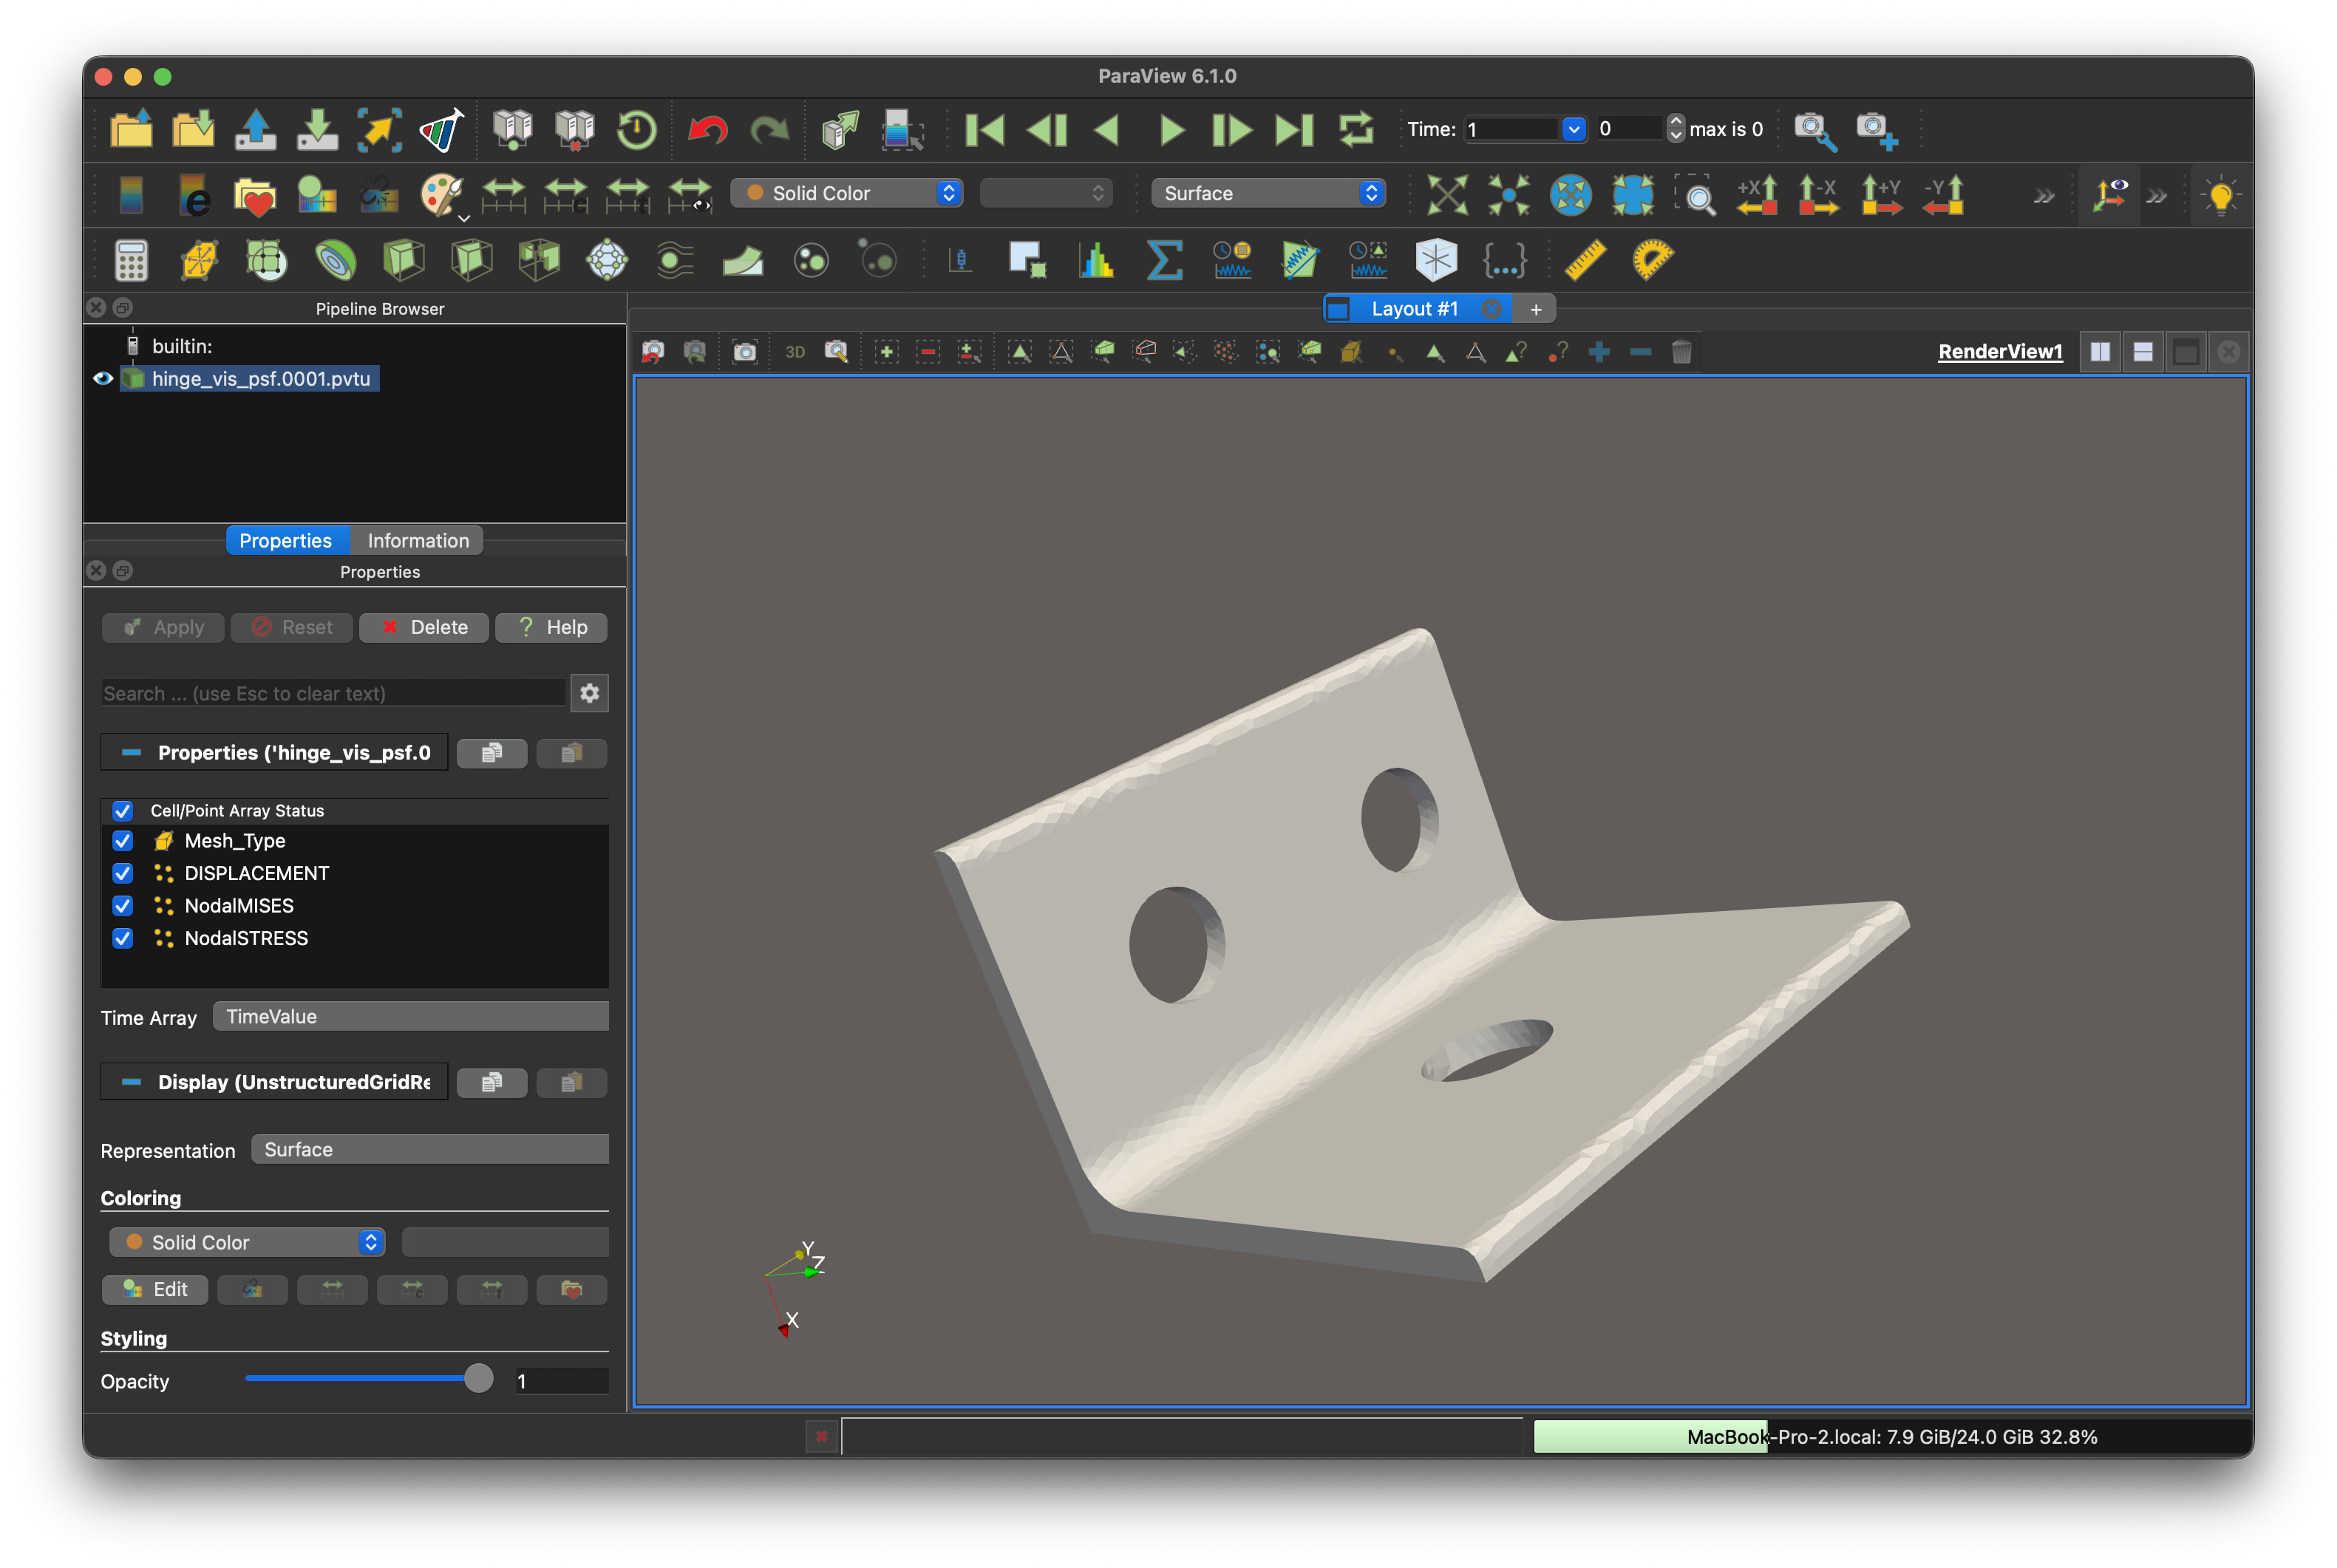
按下 Apply 後會顯示鉸鏈幾何形狀。
-
04 / 3
將上方工具列的 Solid Color 改為 NodalMISES,即可顯示 von Mises 應力分布。
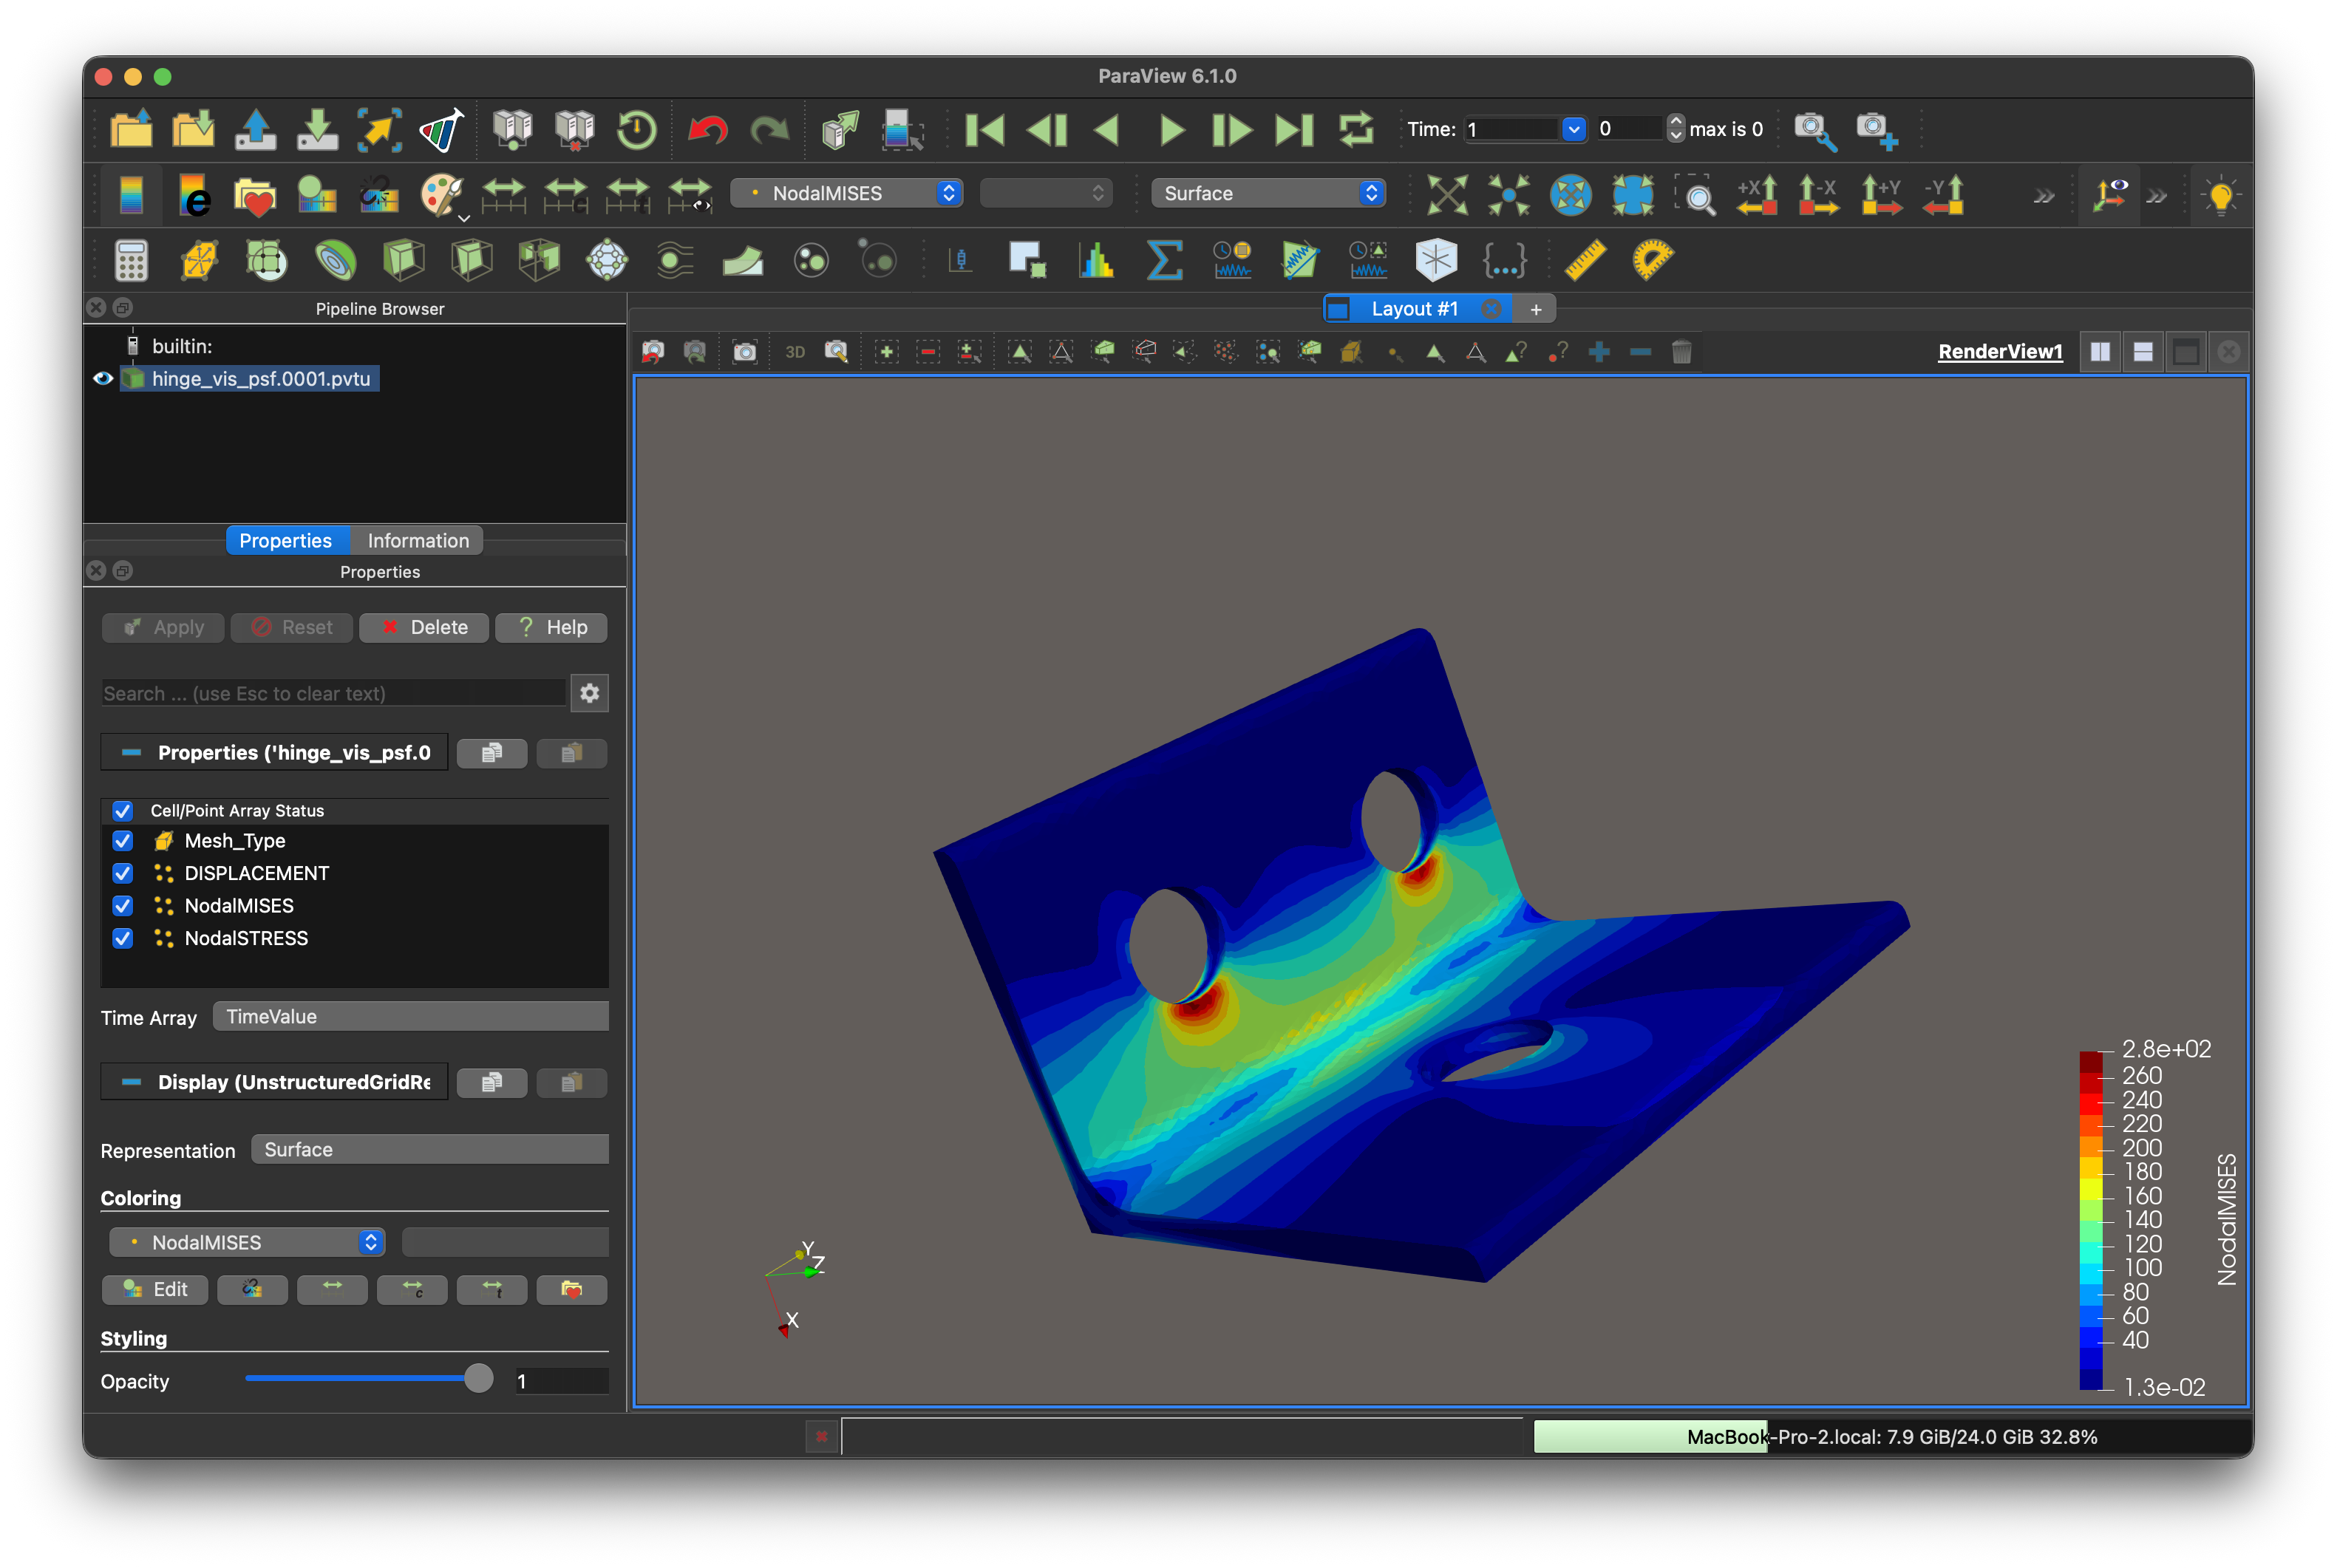
顏色與背景會因 ParaView 設定而異,不必與範例圖片完全相同。如果看不到模型,請嘗試 Reset Camera。