FrontISTR / Getting Started
ప్రారంభించడం
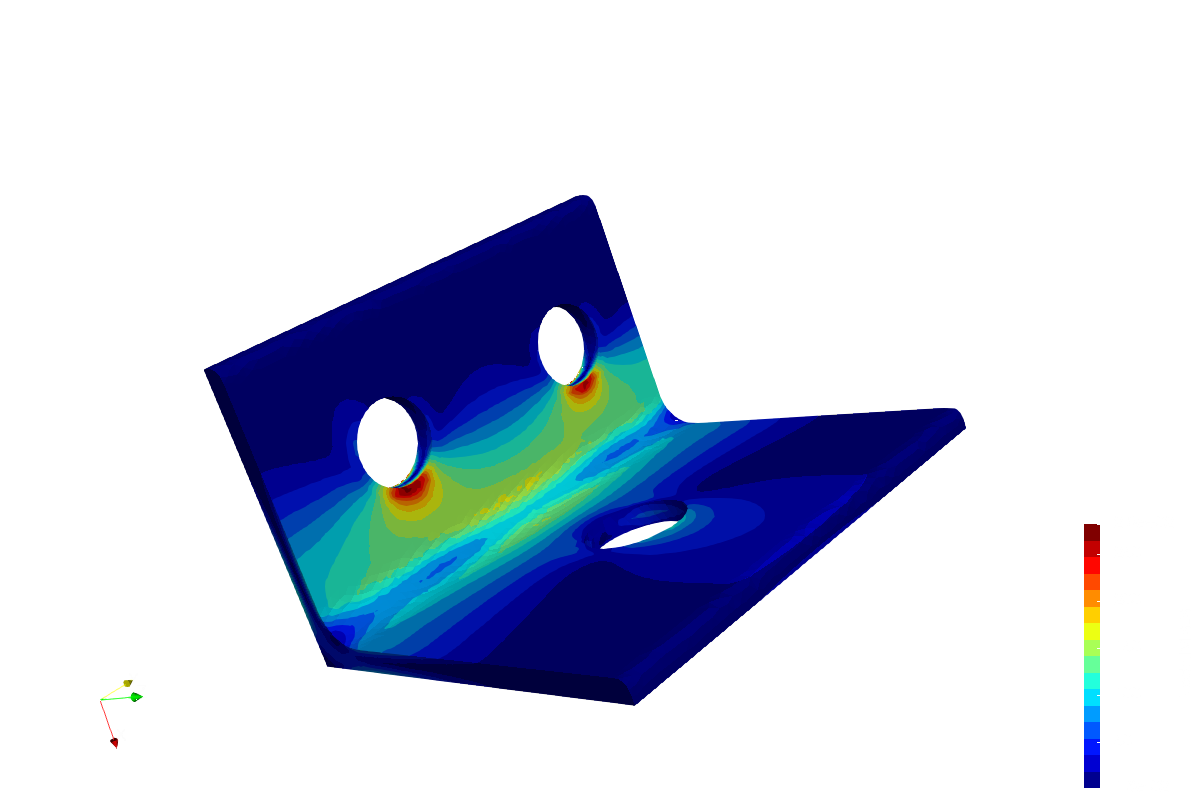
FrontISTR తో ఒక కీల్ను విశ్లేషించి, తరువాత ParaView లో stress distribution చూడండి. సాల్వర్ మరియు సిద్ధంగా ఉన్న ఉదాహరణను ఉపయోగిస్తే, మొదటి ప్రయత్నం కోసం mesh తయారు చేయడం నుంచి ప్రారంభించాల్సిన అవసరం లేదు.
01
solverను సిద్ధం చేయండి
Windows binary లేదా Windows, macOS, Linux లో ఉపయోగించగల Docker image ను సిద్ధం చేయండి.
Windows (64-bit)
ZIP ను extract చేయండి. తరువాతి దశలో ఉదాహరణను సిద్ధం చేసిన తర్వాత fistr1.exe మరియు దానితో వచ్చే అన్ని DLLలను ఉదాహరణ folder (01_elastic_hinge) లోకి copy చేయండి.
Docker (Windows / macOS / Linux)
Docker ను ప్రారంభించి terminal లో క్రింది command ను అమలు చేయండి. Windows లో Docker ను Linux container mode లో ఉంచి command ను PowerShell లో అమలు చేయండి.
docker pull --platform linux/amd64 registry.gitlab.com/frontistr-commons/frontistr/fistr1:masterప్రస్తుత అధికారిక image ను amd64 కోసం build చేశారు. Apple Silicon Mac లలో ఇది emulation ద్వారా నడుస్తుంది కాబట్టి ఎక్కువ సమయం పట్టవచ్చు.
source నుంచి build చేయండి
ఈ operating system లలో ఏదైనా ఒకదానిపై source code నుంచి FrontISTR ను build చేయవచ్చు. compiler లు మరియు అవసరమైన library లు install చేసిన తర్వాత CMake environment ను గుర్తించి build ను configure చేస్తుంది.
మీ distribution కు అనుగుణంగా క్రింది command లతో ప్రాథమిక tools ను install చేయండి. ఇప్పటికే ఉన్న development environment ను ఉపయోగించి MPI లేదా ఇతర optional library లను జోడించకుండా ప్రారంభించవచ్చు.
Ubuntu / Debian
sudo apt-get update
sudo apt-get install build-essential cmake git gfortran
RHEL / Rocky Linux / AlmaLinux
sudo dnf install gcc gcc-c++ gcc-gfortran make cmake gitక్రింది command లు macOS మరియు Linux లో build చేసి install చేసే ఉదాహరణ. executable లు మీ home directory లోని bin కు వెళ్తాయి కాబట్టి sudo లేదా PATH మార్పులు అవసరం లేదు. macOS/Windows సిద్ధం చేయడం మరియు optional library ల కోసం build guide ను చూడండి.
git clone https://gitlab.com/FrontISTR-Commons/FrontISTR.git
cd FrontISTR
cmake -S . -B build -DCMAKE_BUILD_TYPE=Release -DCMAKE_INSTALL_PREFIX="$HOME"
cmake --build build --parallel
cmake --install build
తోడుగా ఉన్న ఉదాహరణను మళ్లీ download చేయకుండా నేరుగా నడపవచ్చు. క్రింది command లతో విశ్లేషణ నిర్వహించి, తరువాత ParaView లో ఫలితాన్ని చూడటానికి step 04 కు వెళ్లండి.
cd tutorial/01_elastic_hinge
"$HOME/bin/fistr1"Binary మరియు container నిరంతరం update అయ్యే master / LATEST version లను ఉపయోగిస్తాయి. release version లు మరియు ఇతర environment ల కోసం download page చూడండి. ఇతర versionలు మరియు environmentలు
02
ఉదాహరణను download చేయండి
ఉదాహరణ ZIP ను download చేసి extract చేయండి. 01_elastic_hinge folder లోని మూడు input file లను ఉపయోగించండి.
extract చేసిన 01_elastic_hinge folder లో విశ్లేషణను అమలు చేయండి. command line ద్వారా extract చేస్తే macOS మరియు Linux లో unzip ఉపయోగించండి.
01_elastic_hinge/
hecmw_ctrl.dat- input మరియు output file స్థానాలు
hinge.cnt- material, load, restraint మరియు analysis settingలు
hinge.msh- hinge mesh
command line ద్వారా ఉదాహరణను సిద్ధం చేయాలంటే, దాన్ని ఉంచాలనుకున్న చోట క్రింది block మొత్తాన్ని అమలు చేయండి. ఇది archive ను download చేసి extract చేసి, తరువాత ఉదాహరణ folder లోకి వెళ్తుంది. అదే terminal లో analysis command ను కొనసాగించవచ్చు.
Windows / PowerShell
curl.exe -fL -o 01_elastic_hinge.zip https://www.frontistr.com/sys/files/01_elastic_hinge.zip
if ($LASTEXITCODE -eq 0) {
  Expand-Archive -Path 01_elastic_hinge.zip -DestinationPath . -ErrorAction Stop
  cd 01_elastic_hinge
}
macOS / Linux
curl -fL -o 01_elastic_hinge.zip https://www.frontistr.com/sys/files/01_elastic_hinge.zip &&
unzip 01_elastic_hinge.zip &&
cd 01_elastic_hinge
03
ఉదాహరణ folder నుంచి run చేయండి
ఉదాహరణ folder (01_elastic_hinge) లో విశ్లేషణను అమలు చేయండి. hecmw_ctrl.dat అక్కడ ఉందని నిర్ధారించండి.
Windows binary
ఉదాహరణ folder లోని fistr1.exe పై double-click చేయండి. దానితో వచ్చిన DLLలు కూడా అదే folder లో ఉండాలి. అమలు ముగిసినప్పుడు window మూసుకుపోతే, ఉదాహరణ folder లో రాసిన ఫలితాలను ParaView లో తెరవండి.
logను చూడాలంటే
window వెంటనే మూసుకుపోయి ఫలితం రాకపోతే, లేదా log చూడాలనుకుంటే, ఉదాహరణ folder లో PowerShell తెరిచి క్రింది command ను అమలు చేయండి:
.\fistr1.exeDocker (Windows / macOS / Linux)
docker run --rm --platform linux/amd64 -v "${PWD}:/work" -w /work registry.gitlab.com/frontistr-commons/frontistr/fistr1:master fistr1ఉదాహరణ folder లో terminal తెరిచి (Windows లో PowerShell) command ను అమలు చేయండి. ఉదాహరణ folder container లో /work కు mount అవుతుంది. ఫలితాలు మీ local ఉదాహరణ folder లో save అవుతాయి.
terminal లో అమలు చేసినప్పుడు log చివరలో క్రింది message కనిపిస్తే విశ్లేషణ పూర్తయింది. పట్టే సమయం మీ PC పై ఆధారపడి ఉంటుంది.
FrontISTR Completed !!ఏదైనా సరిగా పనిచేయకపోతే
input file లు కనిపించకపోతే, 01_elastic_hinge folder నుంచే విశ్లేషణను అమలు చేస్తున్నారో చూడండి. Windows లో fistr1.exe మరియు దానితో వచ్చే అన్ని DLLలు అదే folder లో copy అయ్యాయని కూడా నిర్ధారించండి.
04
ParaViewలో ఫలితాన్ని తెరవండి
ParaView ను install చేయండి. File → Open ఎంచుకుని ఉదాహరణ folder లోని క్రింది file ను తెరవండి.
hinge_vis_psf.0001.pvtuఫలితాలు అదే 01_elastic_hinge folder లో రాయబడతాయి. పక్కన ఉన్న hinge_vis_psf.0001 folder కూడా అవసరం కాబట్టి .pvtu file ను ఒక్కటే తరలించవద్దు. 0000 ప్రారంభ స్థితి, 0001 load ప్రయోగించిన తర్వాతి ఫలితం.
స్క్రీన్ ఉదాహరణ: macOS పై ParaView 6.1.0. Windows మరియు Linux లో కూడా ప్రాథమిక దశలు ఒకటే.
-
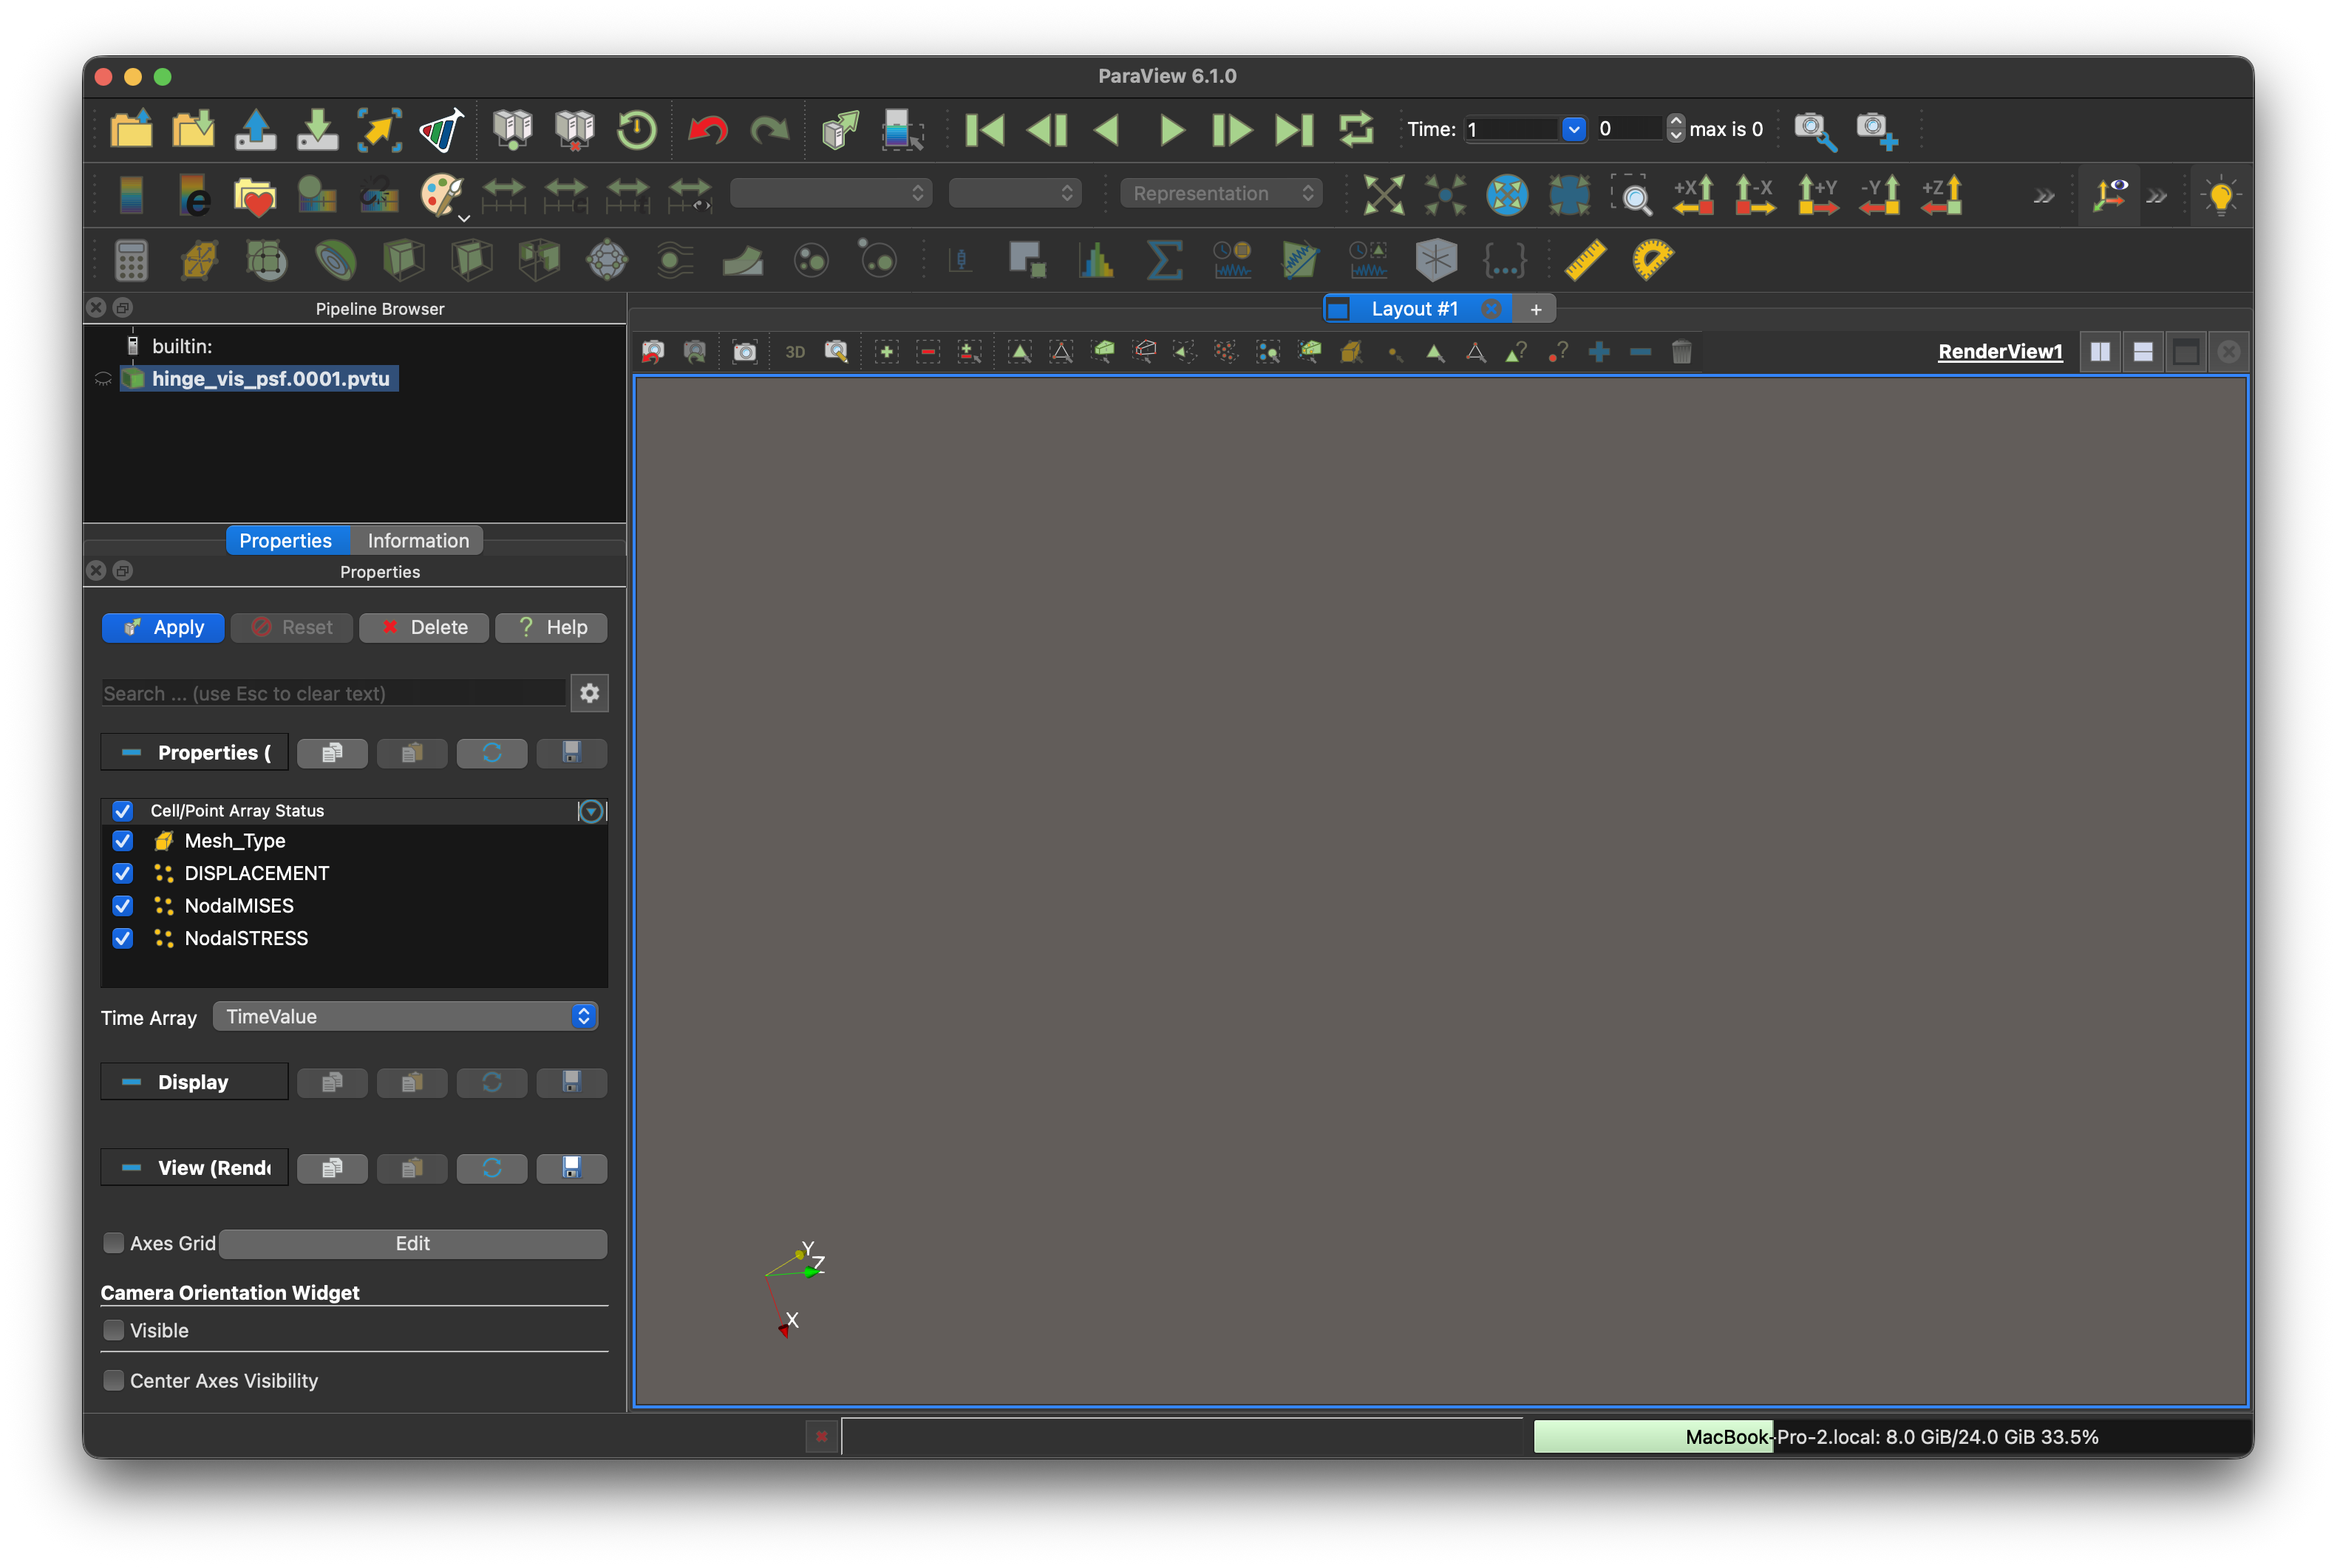
04 / 1
file తెరిచిన వెంటనే కనిపించే దృశ్యం. ఎడమవైపు Apply పై click చేయండి.
-
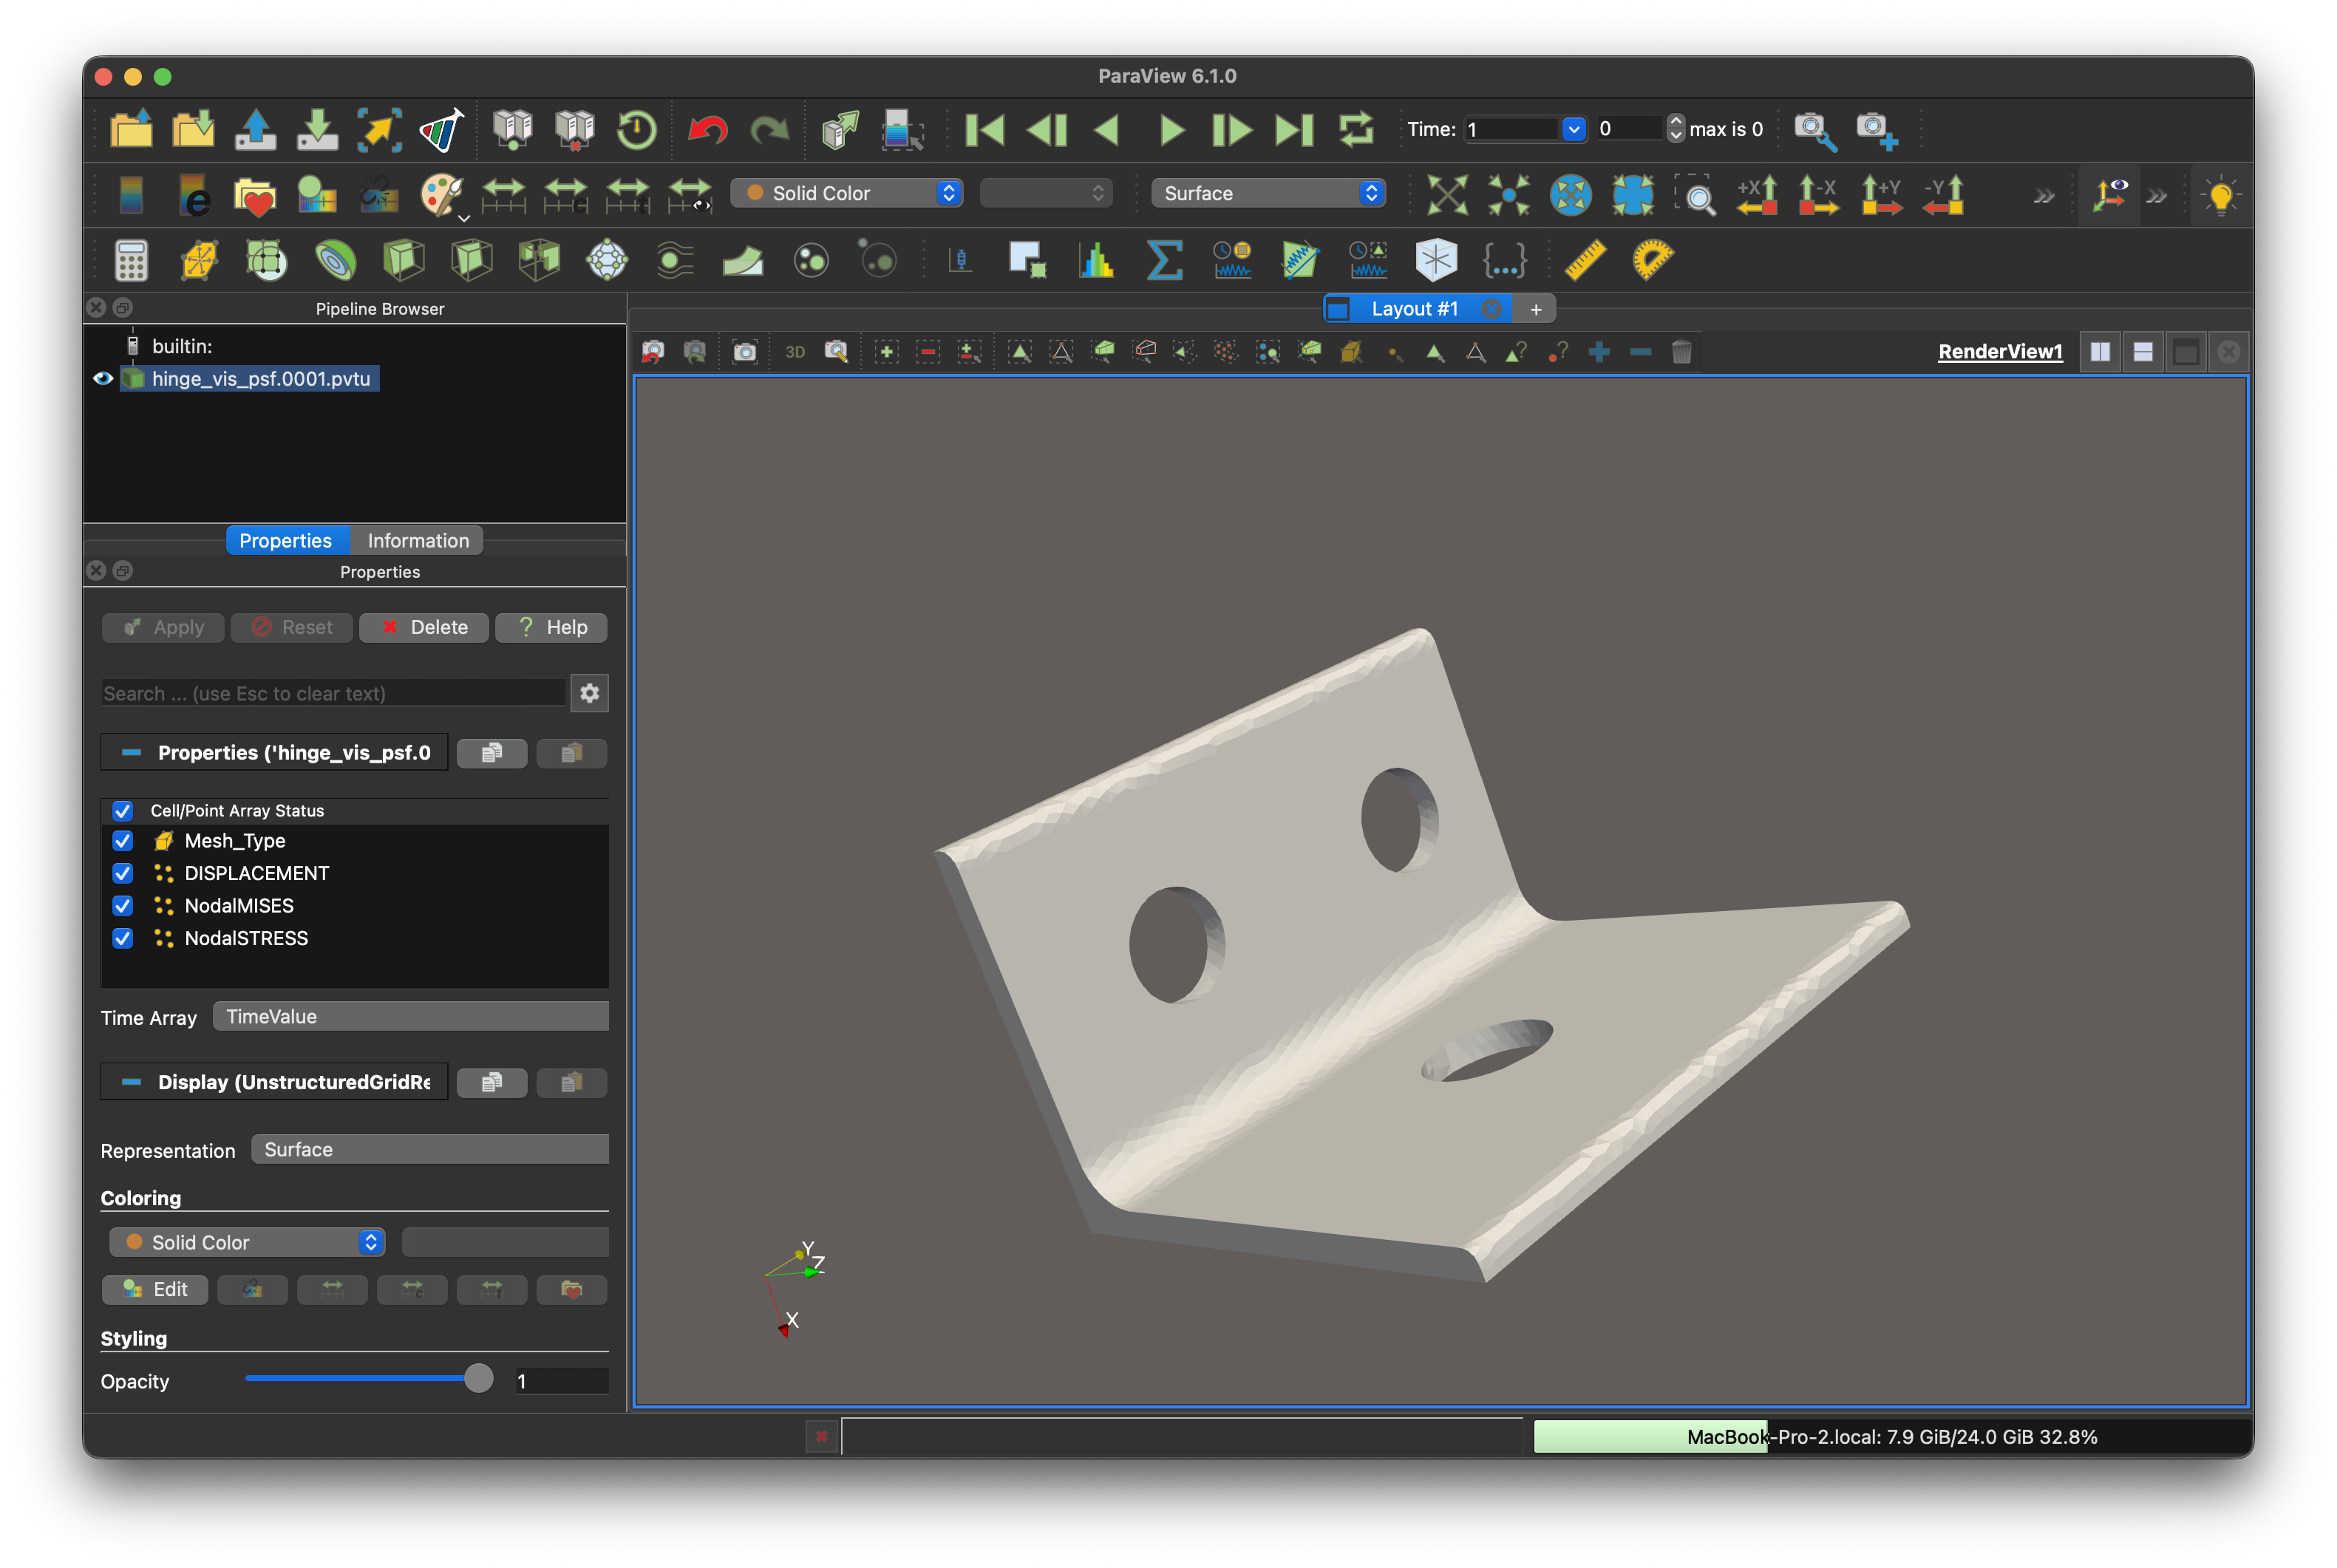
04 / 2
Apply పై click చేసిన తర్వాత కీల్ geometry కనిపిస్తుంది.
-
04 / 3
పై toolbar లో Solid Color ను NodalMISES గా మార్చితే von Mises stress distribution కనిపిస్తుంది.
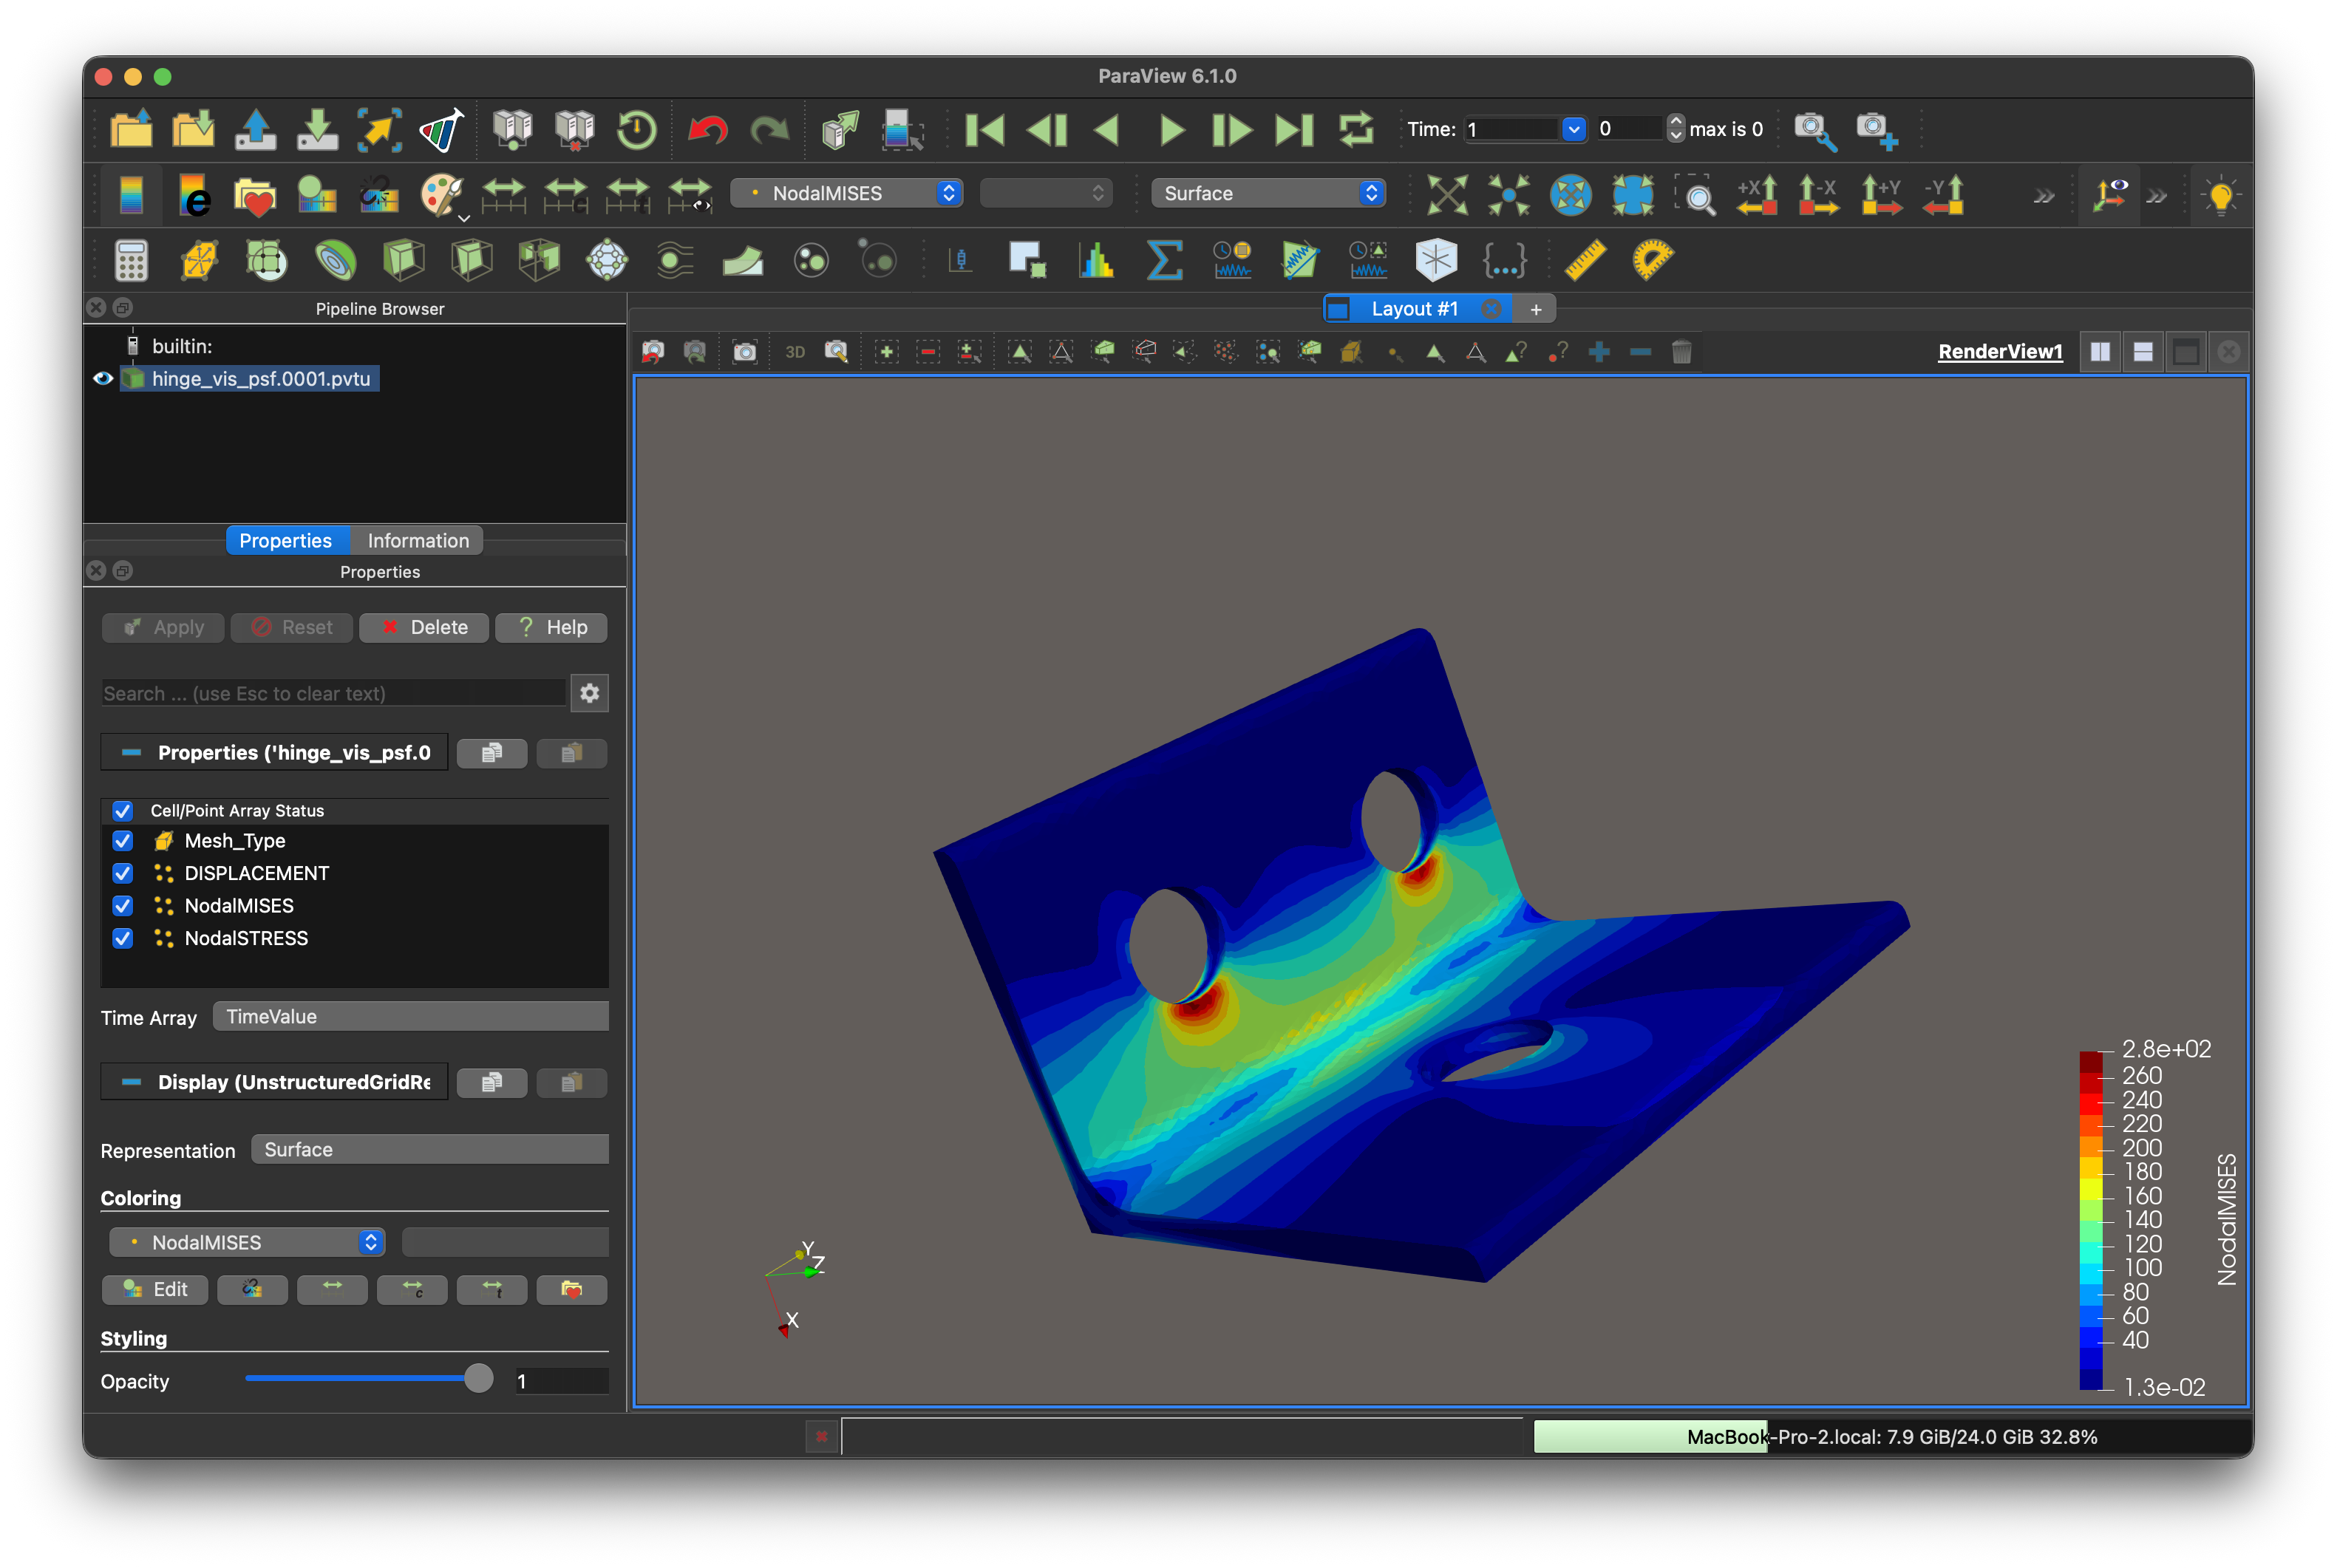
రంగులు మరియు background ParaView settings ను బట్టి మారవచ్చు; ఉదాహరణ చిత్రంతో సరిగ్గా సరిపోవాల్సిన అవసరం లేదు. model కనిపించకపోతే Reset Camera ప్రయత్నించండి.
మీ మొదటి analysis పూర్తయింది
తర్వాత ఉదాహరణలోని load మరియు material settings ను చూడండి. manual ఈ model ను వివరిస్తుంది మరియు ఇతర analysis రకాలను పరిచయం చేస్తుంది.